Wednesday, 24 February 2021

Sunshine Bear Mini Flip Slider Card

Hi there! Today I’ve got a birthday card that features the sweetest, little bear from the brand new “Hello Sunshine” stamp set from Gerda Steiner Designs. I chose to make this into a birthday card, but there are some really nice sentiments in the set that would make it suitable for a “hello” card as well. My card also has what I’m calling a mini flip slider mechanism which is quite simple to make, and there are no dies required. I had the thought - “What’s better than one smiling bear on a card?” Well, that would be four smiling bears on a card!! And so the mini flip slider came into play.  :)  

I’ve got a video for you of how I made the flip slider so if you would like to see how I created it, PLEASE CLICK HERE.


I borrowed that little bunny and his presents from the GSD “Birthday Bear” stamp set as I thought he would go so well with this bear.  The banner is from Whimsy Stamps and is called the Slimline Bunting Banner die set. I’ve listed the copic markers I used down below. Thank you so much for joining me, and I hope you’re having a great day! 

Copic markers used:

Light Brown Bear - E35, E34, E53, E51  Sign - BV04, BV02, BV01

Dark Brown Bear - E59, E57, E23, E31 Sign - G94, G82, G20

Black Bear - N6, N4, N2, N0 Sign - BG 72, B52, BG000

Grey Bear - W7, W5, W3, W1 Sign - YR21, YR31, YR20

Bunny - W1, W2, W3, E40, R00, R20


Wednesday, 10 February 2021

Shaking up Some Positivi-Tea

Hi everyone and welcome!  I’ve got a shaker card for you today that features the new Gerda Steiner Designs stamp set called Positivi-Tea.  This is such a sweet stamp set and makes such an uplifting card that can be sent to anyone during these difficult times when we’re all trying to stay healthy and sane. 

This is the front of the card and as you can see, it’s got a shaker element to it. I’ve die cut the shaker frame several times from a Sunny Studios Frilly Frames Herringbone die, but any frame die would work here. I backed it with a purple pearl cardstock and filled it with some coordinating shaker elements. Since I wanted to have a fun inside element, I’ve only added the sentiment and this sweet bear to the front of the card. I coloured him with alcohol markers (listed below), and mounted him just at the side of the card. I white heat embossed the hearts on the cup and teapot from a small heart stamp I found in my stash. 


So for the inside fun, I’ve added the little mouse with his tea set, complete with a used tea bag! I coloured and fussy cut them out before adding them to the card.  I love that inside sentiment and I think it’s just such a nice, inspiring message to send anyone. Thanks so much for stopping by and I hope you’re having a great day! 

Alcohol markers used:

Bear - Spectrum Noir in BG 7, BG 5, BG3. Copic markers in C1, C0, R00

Mouse - Copic C2, C1, C0, R00

Tea Set - Copic B66, B63

Tea Bag - Copic E25, E31, E53, Colourless blender 0. 

Friday, 5 February 2021

Acetate Embellishments from Laminating Pouches with Video

Hello and welcome! I’ve been on a bit of a laminating streak lately and I’ve got a few cards to share with you today that all use embellishments made from laminating pouches.  This is a slightly different post today because I mainly wanted to share with you how to create these embellishments rather than to make a card. I do have several card examples to show you though, so I hope you’ll hang in there with me. I’ve got a video of how I made these so if you would like to see it, PLEASE CLICK HERE.


I have an inexpensive laminator and laminating pouches, all from Amazon. I typically start by cutting my pouch in half lengthwise as I feel I waste less this way. I open the pouch and apply alcohol inks to one side of the pouch. I find the ink doesn’t move as easily as it does on Yupo paper or a glossy cardstock, so I probably use more blending solution than normal. I use a hand held air blower to help move the ink around and I try to leave about a half an inch to inch around the edges free of ink. Once the ink is dry, you can close it up, put it in a parchment carrier and run it through the laminator. However, I should note that you can also use a stamp and a pigment ink to stamp an image on the other half of the inside pouch.  The ink must dry though or it will smudge when it goes through the laminator. The other options I have found for stamping, are after laminating, to use a Stazon type ink, or to emboss a stamped image with Versamark ink and embossing powder ( don’t forget to use an anti-static powder bag before stamping). Also, if you stamp after laminating, check both sides of the pouch because often, one side is a little nicer than the other.  

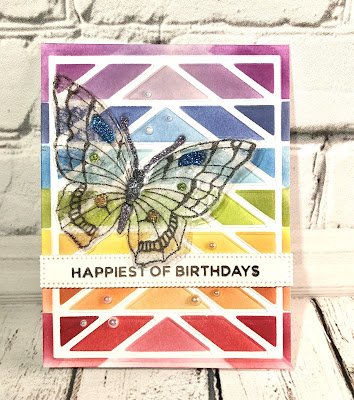
Once you have laminated the pouch, you can die cut images from it or fussy cut around stamped images. I find I save even the small scraps to cut small butterflies or hearts from. On the example above, I stamped the butterfly with white Stazon ink, and after cutting it out, I creased along the edges of the body on my scoreboard. I found that when I folded along the creases and scored it, the butterfly seemed to separate slightly along the fold. I fixed this by putting it back in a parchment carrier and ran it through the laminator again. I have even made some see-through windows with these as well as shaker cards.  There are just so many possibilities!  I have some more card examples below to give you a few more ideas.  I really hope you’ll give this technique a try and share your work!