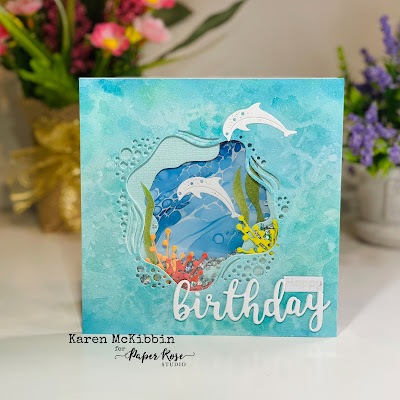
Hello again, and welcome. I've got two birthday cards today that are the result of using the positive and negative images from some die cuts. I love getting a 2 for 1! Here's a look at the two cards:
CARD 1
The first card is a shaker card. I started by adding some Catherine Pooler inks to my card front in Aquatini, Stone Blue and Seafoam. I added in some water drops and then reinked over those once they were dry. I repeated this several times until there was some depth and interest to the cardstock. Then I used the Cracked stencil over top and spread some Nuvo Jewel Drops in Sea Breeze over the card front.
When this was dry, I used the Dolphin Dance dies to cut out the center. I also cut the dolphins from white cardstock and set them aside. I had originally thought I was going to create more layers for this card (which is why the second card has so many layers), but changed my mind and only cut one lighter green-blue piece of cardstock, using the Splat Nesting die for this. I used one of the pieces of Inky Colour papers to place at the back of the opening.
I covered the back of the card front with a piece of acetate. I put a second piece of acetate behind the lighter green-blue layer as well. I placed double side foam tape around the back of the opening on the card front to create a well for my shaker.
I had to get a little creative with the coral and seaweed as I did not have any dies for this. So the "coral" is acutally one of the branches from the Little Foliage 2 set that I coloured, cut apart and then glued back together to look a little like coral. The "seaweed" is made from the wavy border die in the Wave borders die set. I cut it from some inked up green card, and then cut it out to make seaweed by following the die cut lines. I glued these element onto the back of the card front before adding the shaker bits and attaching the second die cut layer.
I positioned the Inky Colour paper onto the card base and added the one dolphin so he could be seen through the opening. I then attached the shaker layers to the card front. Finally, I added the second dolphin and the sentiment.
CARD 2
I started this card by cutting through the card base with the bubbly border die from the Wave borders die set. I cut through both the front and back and had to run it through my die cutting machine several times. I then added a lighter blending of the same inks used in the first card. Then I used the Cracked stencil over top and applied some Liquitex Gloss Heavy Gel that was mixed with some of the Aquatini ink.
Once the card front was dry, I started layering up my die cut pieces. I had used the Splat Nesting dies to cut all of them except for the top layer. The very top layer was applied with foam tape to give some added dimension. I added in my seaweed and coral in a few places.
I die cut the fish from white cardstock and then backed them with some scraps of the Inky Colour papers. I added these to the card front and then added the sentiment. I created the sentiment on my computer as I didn't have anything fishy enough in my stash!
Thank you for stopping by today and I hope I may have given you some inspiration.


