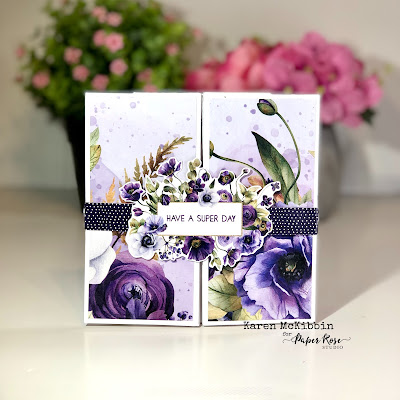
Hello everyone, I've got a trifold card to share today, but it could easily be just a regular card and I'll show you how. This card is a little smaller than typical, measuring 4" x 5".
Paper Rose Studio Supplies: Tulip Border 1 Metal Cutting Die 29674, Summer Picnic Die Cuts 29952, Stitched Ovals Metal Cutting Die 16551, Black & White A5 12pc Sentiment Sheets 19023, 19499 Clear Crystal Mix.
I started making this card by watercolouring two panels on Bristol cardstock. I used reds, yellows and some orange on one of the panels, and more blue, green and purple on the other one. I added some Spectrum Noir Sparkle Ink in Crystal Clear, but you could easily add any shimmer pen or embossing paste instead. If you don't want to make this into a trifold card, just choose one colour combination. Once the paint was dry, I die cut the oval shapes (I used the third largest oval die in the collection ~ 3"x4"). I also cut 2 - 1" x 4.75" panels from each colour. I also cut three more ovals from white cardstock to use on the inside.
Next, I cut two 4" x 5" card bases from a 10" x 4" piece of white 100# cardstock. If you want to make the trifold card, I trimmed the tiniest ~1/8" from the right hand edge of each card base (this just allows the card to fit together better when joined). On the right and left edges of the card front, I attached the two border panels, leaving a small white border around the edges. If you are making the trifold card, the second card will fold out from the opposite side (left to right), so the front panel of this card will be on the far right when the card is open.
On the front of one of these card bases, I cut out the Tulip Border 1 die, centering the tulips in the middle of the card front. Since the tulips cut into the watercoloured portion of the card, there will not be a white border there. To get around that, I cut another of the Tulip Border 1 die from white cardstock twice and then fussy cut out the tulips. It was quite easy to do this, but you could easily pencil in a cutting line first and then cut that out. I glued this tulip outline over the tulip on the card front, and also on the blue one if you're making the trifold card.
Next, I placed the oval behind the tulips on the first (orange, yellow, red card) and glued it in place by adding glue to the backs of the tulips and along the outside edges of the oval where it met the right and left border of the card front. If you are making the trifold card, just do this on the regular card front for now. To determine the placement of the inside, center oval, I placed my card face down on my work surface, and placed one of the white ovals over the first oval with the good side facing down. I then added glue to the back of this oval, and making sure it was lined up with the already glued front oval, I carefully closed the card back and pressed the oval into place. Just check the front to be sure the ovals are definitely lined up correctly.
At this point, you could choose to just leave this as a regular card, and then decorate the front and add a sentiment. However, if you want to make the trifold, I attached the second card base to the front one by gluing the left hand side behind the first card base. I still hadn't attached the oval behind these tulips, so I placed the watercoloured oval over the middle one in the first card base with the coloured side up. I glued the back of the tulips on the second card base and just along the edges of the borders where the oval would attach. Keeping the oval in place over the already glued center oval panel, I carefully closed the right hand card front and pressed it into place so the oval was now glued in place. Just check again that you've got them lined up correctly. Finally, I used the two extra white ovals I had cut to cover the inside of the watercoloured ovals as mine were quite messy from the ink. Then I used the die cuts from the Summer Picnic set to decorate the left and right ovals.
Finally, on the front, I attached the sentiment and added a few crystal drops from the shaker mix. Whew, if you've made it to this point, kudos to you for sticking it out! 😀 Thank you so much for joining me for this very lengthy explanation - I had intended to make a video as that would have been so much easier, but I just ran out of time.


