Tuesday, 20 February 2024

Rainbow Twirl Circle Card

Hello and welcome back! I've got a really simple card to share today.  

Paper Rose Studio supplies used: Rainbow Twirl 2.0 12x12 Paper Collection 31046, Honeysuckle Circle Metal Cutting Die 21204, Austin Circle Frame Metal Cutting Die 30225, Big Sentiments 1.0 A5 12pc Sentiment Sheets 22336.

This card came about because my order from Paper Rose Studio arrived and three of these products were in my package, so of course I needed to have a play! 😀  I realized that the Austin Circle fit very nicely around the Honeysuckle circle frame, so I went from there.

The card is a 5 1/2" square card, and I started by die cutting the Honeysuckle die in the bottom right corner.  Then I just die cut an assortment of circles around it.  I die cut several more of just the floral part of the honeysuckle die and layered two of these behind the bottom right Honeysuckle floral part on the card front. This gave the floral part here three layers and helps it stand out a little more.  I used a third floral piece and separated it to fit in behind two of the other circles.  Once all these floral parts were glued to the back of the card front, I layered scraps of white cardstock in strips of three and used these to build up the back of the card.  You could also use foam tape or craft foam for this.  Next, I cut a piece of the Rainbow Twirl 2.0 paper to fit behind all the circles.  Isn't that paper gorgeous?!

I fussy cut around the sentiment and mounted it on foam tape in the bottom left corner circle. Then I die cut some circle outlines using a larger and one smaller circle die to create the rings around the circle openings.  I actually cut this from a scrap I had from the Rainbow Twirl original paper, but the 2.0 pack has similar papers in it that could also be used.  I just hate to cut into a whole sheet just for such a small thing. I cut the outer circle of the Austin Circle die and placed this over the bottom right Honeysuckle die cut circle.  Then I mounted the card front to my card base, and finally added a few pearls.  I love that the Rainbow Twirl paper does most of the work on this card!

Thanks for stopping by today, and I hope you're having a great day!

Monday, 12 February 2024

Off the Edge Acetate Cards *VIDEO*

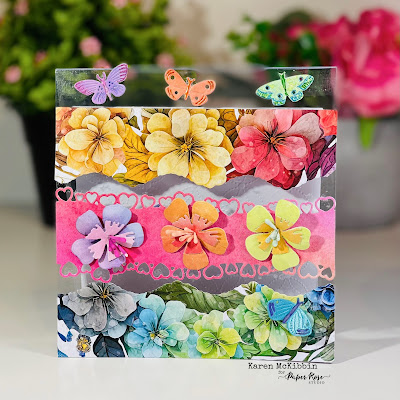
Welcome back!  I am on a mission this year to use up my scraps and excess supplies in my craft room, and I have made a couple of videos and quite a few cards in the process so far.  I came up with an acetate card design in the process, where some of the elements float off the edge and I wanted to try making more of them. So today, I've got several examples for you and a video showing how I made these. Here's a look at what I came up with ...


You can see that some of the cards have acetate all around the paper elements, creating that floating look.  The last one only has the little butterflies at the top floating off the edge. I've used 8 mil thick acetate for all these cards so they would stand up easily (I used Amazon Basics Binding Presentation Covers, 8mil, Letter Size, 100 Pack, Clear but they are not available at this time here in Canada).  But any acetate that is 8 mil thick will be strong enough for these cards. 

 I hope you will come join me for the video to see how they are made.  PLEASE CLICK HERE to see the video.

Thank you for stopping by today and I hope you are having a happy, creative day!
 

Friday, 2 February 2024

Big Wave Cards *VIDEO*

Hello everyone, I've got a super fun card style to share with you today, and the first card is just in time for Valentine's Day.  These cards are reminiscent of the stadium wave where everyone jumps up with their hands above their heads in succession.  As you open the card, all the little die cuts pop up in succession.  It was really hard to photograph, so I do apologize.

I've kept the front of the cards quite simple, and have made a belly band for all the cards (there are several more examples in the video). But hopefully, you can see how those little gnomes and other elements pop up as the card opens.  This is actually quite a simple card to make, and once you have assembled the mechanism, all that's left is to have fun decorating it.  And it's a really fun card to give away and watch people open! I've made a video for you showing how to make these, so I hope you'll come join me over there.  PLEASE CLICK HERE to watch the video.

Thank you for stopping by and I hope you're having a great day!