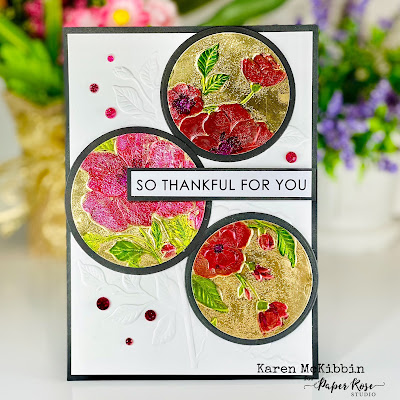
Hello everyone and Merry Christmas! I've got a couple of embossed and foiled cards to share today.
Supplies Used: Beautiful Bouquet 3D Embossing Folder 32949, Arch Border Frames Metal Cutting Die 30420, Big Sentiments 1.0 A5 12pc Sentiment Sheets 22336 , All Occasions Sentiments A5 12pc Sentiment Sheets 22339, alcohol inks, foiled cardstock, acetate
Circle Card
To create this card, I cut 3 circles of gold foiled cardstock and embossed them in the Beautiful Bouquet embossing folder. I also embossed the white cardstock in the same folder. I have a small paintbrush that I keep with my alcohol inks, and I used this to paint on some alcohol ink onto the flowers and leaves. It's difficult to get these inks to blend well, so I had to just "let it be" after the inks went on. Once the ink was dry, I swiped my VersaMark ink pad over the top of the painted pieces. Then I added some clear embossing powder and heat set it. The powder landed in various areas of the foiled circles, but I quite liked that and left it that way. However, you could use a dry brush to remove the powder from the non-inked areas. Next, I cut black circle mats to back the inked circles and attached them together. To assemble the card, I matted the white embossed background with black cardstock, and adhered it to my card base. I pieced the circles back onto the white background where they matched the embossing, and added the sentiment and glitter dots.
Arched Card
This card started off much like the first. I embossed the gold foiled cardstock and then painted on the flowers and leaves with alcohol ink. I then swiped my VersaMark inkpad over the front and added the clear embossing powder. Once this was heat set, I repeated this process. I had also embossed a piece of acetate, and I found that I liked the look of the acetate over the gold foil so I used a double sided adhesive to attach these together around the outside edges. Next, I cut the arch out of the black card front, and matted this over the foiled acetate image. Then I attached this to my card front and added the sentiment.
I hope I've been able to give you a little inspiration today as that is a beautiful embossing folder! Thanks for stopping by!


No comments:
Post a Comment