Monday 25 December 2023

Gnome Birthday Card

Hi again everyone!  Today I've got a quick and simple birthday card for you.  I need a few birthday cards in February, and I thought this one could be used for one of my recipients.


Supplies Used:  Hey Gnomie Embossed Die Cuts 30921, Ornate Swirl Rectangle Frame Metal Cutting Die 20129 .  Other supplies:  Catherine Pooler Inks in Tiara, Apricot, and Orange Peel.

I started this card by ink blending over the card front using the inks as they are listed above to get an ombre effect.  Next, I cut two of the background die and glued them together, before gluing them down over the card front.  Isn't that a pretty background die?! Finally, I chose some of the die cuts from the Hey Gnomie set and glued them in place on my card front.  What a simple card to make, but those gnomies just make it so celebratory! 

Thank you for taking the time to stop by and I hope you're having a great day!

Thursday 21 December 2023

Flowery Heart Card

Hello everyone!  Today I have a fairly simple card for you that could be used for Valentine's Day, for an anniversary or just a friend/family card.  

Supplies used: Rainbow Twirl F 12x12 Paper (12pc Bulk Pack) 30447 (I used papers F and D), Nesting Hearts Metal Cutting Die 28813, Little Foliage 1 Metal Cutting Die 21099 , Big Love You Metal Cutting Die 28855, 19499 Clear Crystal Mix


To create this card, I selected a section of the wreath on the Rainbow Twirl F paper and carefully cut out just enough to die cut with the largest of the heart nesting dies.  Believe me, I had to take a deep breath before cutting into that paper as it is so pretty and my tendency would be to hoard it! But I'm happy to say that I have a LOT of the wreath left over to make more cards with. 😄

After die cutting the heart out of the paper, I added some craft foam beneath it for extra dimension.  I die cut the leaves repeatedly from white cardstock until I had enough to surround the heart, and added them to the back of the heart with glue.  

From the Rainbow Twirl D paper, I cut  a section that was 5" x 6" for my card front.  I attached this to a card base I had created in the same dimensions.   

I cut the "YOU" sentiment three times and stacked them together with glue.  The "love" sentiment was cut once from white cardstock and once from a scrap of the Rainbow Twirl D paper, and I glued these together with the coloured paper on top. 

To assemble the card, I adhered the "YOU" sentiment at the bottom and glued the "love" sentiment over top of it.  Then I glued the heart above the sentiment at a slight angle.   I added a few of the clear crystal mix gems scattered over the top of the card.  Finally, I used my corner rounder to round the two right hand edges on the top and bottom to soften the look. 

Thank you for stopping by today, and I hope you're having a happy, creative day!
 

Tuesday 12 December 2023

Snowglobe Card *VIDEO*

Hello again everyone, thank you for stopping by.  I have another dimensional card today for Paper Rose Studio, as one of the themes this month was to create a card using a fun fold. And this is a fun fold!


Supplies used:  Enchanting Christmas Embossed Die Cuts 30989, Pinecone Border Metal Cutting Die 26083, Crisp Christmas A5 12pc Sentiment Sheets 19772.  Other supplies: Ranger Alcohol inks in Villainous, Celestial, Patina and Cool Peri, laminating sheet, acetate, white acrylic paint, 110# or 120# cardstock.

This card design is another one that was designed by Sarah Trebilcock, and I have again modified her design to be a little simpler and smaller so that it will fit into an A7 (5 1/4" x 7 1/4") envelope.  Surprisingly, this card will fold down almost completely flat to fit into an envelope too.  I have created a video for you if you would like to see how it's made.  To watch the video, PLEASE CLICK HERE.


Tuesday 21 November 2023

Ornament Christmas Card

 Hi again, I'm still on a roll making Christmas cards, so here is today's card ...


Supplies Used:  Layering Ornate Bauble 1 Metal Cutting Die 30240,   Layering Ornate Bauble 2 Metal Cutting Die 30243 , Snowflake Set 4 Metal Cutting Die 26341, Crisp Christmas A5 12pc Sentiment Sheets 19772.  Other supplies: Ranger Alcohol inks, silver metallic paint, Minc Silver Reactive foil, silver metallic thread.

I started this card by die cutting the two ornaments from silver mirror cardstock.  I then put one of the bauble ornament outer layers under some acetate and added the alcohol ink to the top of the acetate.  The die cut is protected by the acetate, but it allows you to see where the ink needs to go to fill in the ornament.  I was going for a rainbow look between the two ornaments.  Once the ink was dry, I glued the silver ornament die cuts to the top of the inked acetate and placed some acrylic blocks over it to let it set up and dry.  Once the glue had dried, I fussy cut the acetate around the outer edge of the ornaments.

My card base is a 5 1/2" square and I corner rounded all 4 corners.  I then spattered on some silver metallic paint on the front and set it aside to dry.

The snowflake was cut from holographic silver cardstock and I left it as one layer thick.  I foiled the sentiment in my laminator, using the silver reactive foil, and then used a small circle die to cut it out.  I cut an outer circle for the sentiment by taping two circle dies together (one larger and one smaller), and then die cutting the foiled cardstock with this. I also cut the larger of the two circles from white cardstock so I could adhere the outer ring and inner sentiment to it. 

Once the card base was dry, I glued down my elements.  I used some scrap card stock to build up some dimension on the ornaments where I needed it so they would sit flat against the layers below (so on the left side of the blue/purple ornament and the right side of the multi-coloured one).  I also just used a white glue that drys clear to attach the ornaments. 

Finally, I added a little silver metallic thread to the tops of the two ornaments. 

Thank you once again for joining me today, and I hope you're having a happy, creative day!

Sunday 12 November 2023

Sweet Reindeer Christmas Card

 Hello everyone, we're getting close to Christmas so I've got another Christmas card to share with you today.  


 Supplies Used:  Sweet Reindeer Clear Stamp 30693, Pinecone Border Metal Cutting Die 26083, Triple Banner Metal Cutting Die 25924, Crisp Christmas A5 12pc Sentiment Sheets 19772.  Other supplies: Copper heat reactive toner foil, Nuvo Crystal Drops in Red Berry, Nuvo Glitter Drops in Golden Sunset, Cosmic Shimmer Fluffy Stuff in White.

I started this card by stamping the image onto 80# Neenah Solar White cardstock and then using my Copic markers to colour it in.  I'm sorry, but I forgot to write down which markers I used. I fussy cut the image out and added some Ranger Glossy Accents to the candy cane and the berries on the deer's head.  

Next, I die cut the Pinecone border from white cardstock and used my Copic markers to colour the pine leaves and the pinecones.  I added some brown cardstock behind the pinecone to give it dimension, and then trimmed around the edges. Then I cut the pine branches off and separated the pinecones.  

I did a little ink blending behind the reindeer using Catherine Pooler inks in Hot Tub and Matcha colours.  I created an arrangement over this with the pine branches and pinecones.  I was hoping to make it look like the animals were in a forest setting, but you have to really use your imagination for that! Once I had everything where I wanted it, I glued it all down.  

I die cut the outline section of the Triple Banner die from white cardstock that I had foiled by placing double sided adhesive on and then adhering to the foil. I die cut the sentiment from the sentiment sheet by placing the last segment of the Triple Banner die set over it.  I foiled the sentiment in my laminator using the same copper coloured foil (it is shiny in real life). Then I positioned the sentiment below the reindeer scene and made sure some of the pine branches fell over it.  

Finally, I added the Nuvo drops randomly around the branches and added the Fluffy Stuff and heat set that to make it puff up.

Thank you for stopping by today, and I hope I've given you some inspiration.


Thursday 2 November 2023

Dimensional Snowman Christmas Card *VIDEO*

Hello everyone, I've got a fun, somewhat interactive card to share with you today.  It has lots of dimension, but folds flat for mailing.  Here's a look at it ... 

 Supplies Used: Enchanting Christmas Embossed Die Cuts 30989, Layering Ornate Bauble 1 Metal Cutting Die 30240, Merry Duo Layered Metal Cutting Die 30189, Snowflake Border Metal Die 18153, Snowflakes 6x6" Stencil 18198.  Other supplies: Distress Grit paste in Snowfall, Distress Mica Flakes, Cosmic Shimmer Diamond Frost glitter in Sparkle Star.

The snowman will move inside the ornament, and the card has a centre bend in it that can be accentuated to help curve the border and ornament forward. Although it's a fairly simple card to make, it's difficult to explain so I've created a video for you which I hope you will check out.  Here's the link to my VIDEO.

Thanks for stopping by and I hope you're having a great day!

Saturday 21 October 2023

Metallic Hello Card

Hi again everyone!  I've got a bright and shiny card for you today.


Close up of the sentiment and flowers

 Supplies Used: Vintage Hello Layered Metal Cutting Die 30168, Zara Flower Metal Cutting Die 21087, Autumn Dance 12x12 Paper Collection 25345 - Foil. Other Supplies: Gold Mirror card, flower centres, gold embossing powder


This is an A2 sized card so 4 1/4" x 5 1/2" tall.  I started by cutting the Autumn Dance foiled background paper to fit my card front.  I then cut the Hello sentiment from the gold mirror card and adhered it to the centre of the card front.  I also diecut the sentiment from white cardstock 2 more times and then used a die cut inlay technique to glue these white pieces into the gold diecut layer.  This is a really beautiful sentiment, and cuts all the scrolls and leaves, as well as having an outline die.  So you could choose to just die cut this into your card front or have it mounted as I have done here.  

I cut several of the Zara flowers from white cardstock and shaped them using a ball stylus on an old computer mat.  I glued several of them together to make the 3 large flowers.  I used a VersaMark pen just on the tips of the petals and then added the gold embossing powder and heat set it.  Then I poked a hole into the centre of the flowers, and threaded the flower centres through. I used a hot glue gun to glue these in place at the back of the flower.  I also added a little Copic marker to the base of the flower centre as I felt the flowers needed a little more of the pink.  Finally,  I glued the flowers to the card front with my hot glue gun.  

Thank you for stopping by today and I hope I've given you a little inspiration!


Thursday 12 October 2023

Border Dies for Easy Card Making *VIDEO*

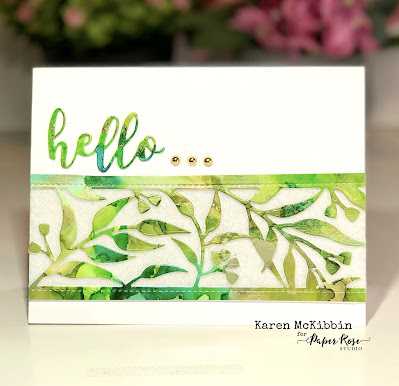
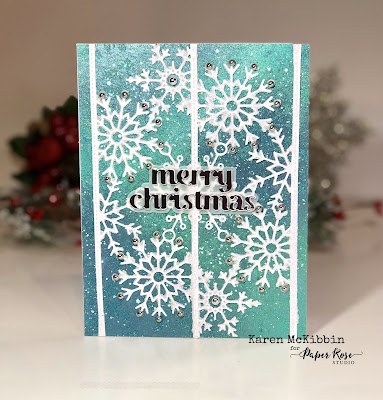
Hi and welcome!  Today I'm using border dies from Paper Rose Studio to create some easy cards.  I find border dies to be relatively inexpensive but so versatile for card making.  I've tried to go from simple to a little more complex in my cards, so hopefully, there is something in there for everyone.  Here are the cards I have created for you today.


Supplies Used: Spotty Line Border Metal Cutting Die 18548, Christmas Friends Die Cuts 30564, Gum Leaf Border Metal Die Set 17874, Hello Layered Metal Cutting Die 18252, Hand Lettered Thanks Metal Cutting Die 25606, Snowflake Border Metal Die 18153, Merry Christmas Chunky Metal Die Set 19511


If you are interested in seeing how I have made these cards from border dies, I have a video for you.  To see the video PLEASE CLICK HERE.


As always, thank you so much for stopping by and I hope you're having a happy, creative day!


Monday 2 October 2023

Floral Hugs Card

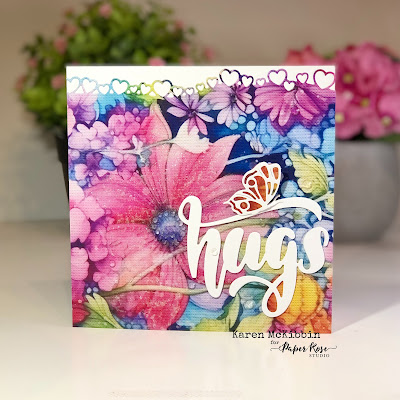
Hello everyone, I've got a beautiful floral card to share today and all the credit goes to the gorgeous Rainbow Twirl paper from Paper Rose Studio. Isn't that paper beautiful?  I made this into a 5 1/2" square card because I wanted to get as much of that paper on as possible. :)

Supplies Used: Rainbow Twirl 12x12 Paper Collection 30429, Hugs Layered Script Metal Cutting Die 28837, Slimline Heart Borders Metal Cutting Die 20886, 19499 Clear Crystal Mix, Amaya Butterfly Metal Cutting Die 19157.  Other: Tim Holtz Distress® Christmas Grit Paste - Snowfall - TSCK81142

To start this card, I cut a 5 1/2" square from the Rainbow Twirl paper, and die cut the top using the Hearts Borders die.  I glued this to my white card base, and then applied the Distress Grit Paste over the large pink flower.  This paste dries translucent but has a bit of a sparkle to it which I wanted to highlight that one big flower. It also has a gritty texture to it as its name suggests.  I set this aside to dry and went on to die cutting 3 of the 'hugs' sentiment and one of the butterfly.  

I glued the butterfly to a scrap of the same Rainbow Twirl paper, and then carefully cut around the die cut wings. I stacked and glued together the three layers of the hugs sentiment.  Once the grit paste had dried, I attached the sentiment and added the butterfly.  Finally, I added the crystal drops around the centre of the pink flower and randomly over the rest of the card.

Thank you so much for stopping by and I hope I've given you a little inspiration today!


Thursday 21 September 2023

Having Fun with the Christmas Poinsettia Border Die *VIDEO*

Hello and welcome back! I have been having so much fun playing with this new Christmas Poinsettia border die from Paper Rose Studio, and thought I would share some ideas with you. It really is a beautiful die and I don't think it is just for Christmas projects, but could be used year round.  I posted a Christmas card last month using it, but here are a couple more ideas for you.

Double Z fold card closed above, and open below


Christmas Lumiere


Supplies Used: Christmas Poinsettia Border Metal Cutting Die 30159, Christmas Poinsettia Flourish Metal Die Set 18312, Merry Christmas Chunky Metal Die Set 19511.  Other supplies: Ranger Alcohol inks in Rosewood, Cranberry, Poppyfield, Red Pepper, Fiesta, Watermelon; 10 PCS Wax Carving Tools; 14 PCS Dotting Tools Ball Styluses.


I hope you will come see how I have made these projects.  To see the video, PLEASE CLICK HERE.

Thank you so much for stopping by, and I do hope you are having a great day!

Tuesday 12 September 2023

Balloon Birthday Card

Hi again everyone, I've got a balloon birthday card to share today that was created with some stencils from Paper Rose Studio.


Supplies Used:  Balloon 6x6" Stencil & Mask 20982, Floral Borders 6x6" Stencil 19342, Happy Birthday Chunky Script Stamp Set 24640, Betty's Garden 6x6 Paper Collection 28576. Liquitex Gloss Heavy Gel, Distress Oxide inks, gold thread, Gelly Roll Sparkle gel pen.

I started this card by using the Ballloon stencil to create the background on an A2 size piece of white cardstock which I later trimmed down to be 4 x 5 1/4". I just used a couple of the smaller sized balloons to stencil the cloud of balloons and tried to leave a slightly lighter area on each balloon, and made sure I overlapped the balloons. Once I was happy with the balloons, I used the gel pen to draw some squiggly lines down for the strings.

On a separate piece of white cardstock, I used the second largest balloon stencil to create the two larger balloons.  To add the Floral Borders stencil over top, I kept the original balloon stencil in place with low tack tape, and then applied the stencil over top of the balloon with a darker ink.  Next, I applied a thin layer of the Liquitex gel over these two balloons to give them a shiny look.  Glossy Accents would also work for this.  Once that was dry, I fussy cut the balloons out, right up to the edge of the stencilling.  I then added the gold thread to the tails of these balloons, using some double sided tape on the back.

Next, I stamped the sentiment with black ink onto the balloon card front, and adhered this to a piece of confetti patterned paper from the Betty's Garden collection and attached this to my card base.  Finally, I used scrap card to add some dimension to the back of the bigger balloons and then glued them onto the card front. 

Thank you for joining me today and I hope I've given you a little inspiration!

Saturday 2 September 2023

Using Die Cuts in Papercrafting *VIDEO*

Hello again!  Today I've got a video for you that is all about using pre-made die cuts in your paper crafting. I have to confess, I had never used these until I joined the Paper Rose Studio design team, but I am so glad that I have found them! They are an inexpensive way to create many beautiful projects and Paper Rose has such a beautiful line of them. They come as a pack of 4 sheets of perforated images that are usually in a range of sizes.  So if you are not keen on colouring in images, these may be the perfect solution for you. Here's a look at what I have created in my video today ...


Coffee cup coasters from the dollar store


 Supplies Used: Bee Happy Die Cuts 27703, Nature Stroll 3 Die Cuts 27898, Heart Circle Coverplate Metal Cutting Die 28819, All Occasions Sentiments A5 12pc Sentiment Sheets 22339, Spring Floral Frame Metal Cutting Die 21054, Leaf Burst Rectangle Frame Metal Cutting Die 20547

 I hope you will join me over at the video to see how I have used die cuts to create all of these projects.  To see the video, PLEASE CLICK HERE.

Thank you for stopping by and I do hope you're having a great day!


Monday 21 August 2023

Missing You Card

Hello again and welcome!  I've got a missing you card to share today ...


Supplies Used: Summer Picnic Die Cuts 29952, Arch Border Frames Metal Cutting Die 30420, Little Foliage 1 Metal Cutting Die 21099, Watercolours - Sublime 12x12 Paper Collection 26440, All Occasions Sentiments A5 12pc Sentiment Sheets 22339

I started this card by cutting an A2 sized piece of the blue watercolour cardstock and adhered it to my card base. I glued the house die cut where I thought it should go in relation to the arches.

Next, I cut the Arch Border die several times from white cardstock.  This die is one piece so with one pass through my die cutting machine, I was able to get all the sizes.  I really wanted the arches to look a bit like a garden arch trellis with leaves coming down.  To do that, I layered the arches with more layers on the largest arch and less as they got smaller. I used 4 of the largest arch, 2 of the middle sized one, and 1 of the smallest arch and glued each of these sizes together.  The die cut pieces actually have a bottom horizontal border that I didn't want, so I lined the arch layers up with the bottoms even and temporarily taped the sides together with low tack tape so I could cut the bottom border off all three sized arches evenly. 

Then, using the Little Foliage die, I cut from the green Watercolour cardstock, a number of the leaves.  Some of the leaves are cut from the back of the green cardstock so they would look like they were curving the other way.  I glued these onto the arches with them coming down in front and behind the arches.  When I was happy with the leaves, I removed the low tack tape that was keeping the side arches in place, and glued the arches onto the card front around the house.  Finally, I glued the remaining dog, poppies and butterfly die cuts in place.  The sentiment was adhered across the front of these.

Thank you for stopping by and I hope you're having a creative day!

Saturday 12 August 2023

Christmas Poinsettias Card

 Hello again! I've got a Christmas card today created from some new products from Paper Rose Studio. 

Supplies Used: Poinsettia Bouquet Clear Stamp Set 30306, Christmas Poinsettia Border Metal Cutting Die 30159, Merry Christmas Chunky Metal Die Set 19511, silver mirror cardstock.


I started this card by stamping the poinsettia image onto Neenah Solar Crest 80# cardstock with Gina K amalgam black ink.  I coloured it in with Copic markers (R39, R29, R35, YG01 for the main poinsettias, R46 for the berries, and BG72, BG70 for the leaves).  I then applied some Glossy Accents to the berries and set it aside to dry before fussy cutting it out.

Next, on a white A2 (4.25" x 5.5") sized card front, I die cut the Christmas Poinsettia Border die twice, trying to get it evenly spaced across the card as well as up and down.  I glued this onto an A2 sized piece of silver mirror cardstock, and then adhered this to my card base.  This is a really beautiful border die!

On a scrap of white cardstock, I applied a red ink ( I think it was Rouge by Catherine Pooler), and then die cut the Merry Christmas from this.  I also cut two more from white cardstock and stacked these together with glue.  I die cut the shadow layer from the same white cardstock and then glued the sentiment to the shadow layer.  I applied Glossy Accents to the sentiment and let it dry.

Finally, to assemble the card I glued the poinsettia image just above the center and the sentiment just below this.  The silver mirror cardstock really gives this card a lot of shine and the die cut borders look so delicate! 

Thank you for stopping by and I hope you're having a great day!

Wednesday 2 August 2023

Stencilling on Acetate *VIDEO*

Hello and welcome back!  Have you ever tried to stencil onto acetate? It can be very effective, especially if you want a see-through window on your card, or just the shine you get from the acetate.  Here are a few of the cards I created for my video ...

I've used different mediums on each of these cards, but they are all stencilled onto acetate and really do have a beautiful shine in real life.  I hope you'll come join me and find out how they were made as well as the other cards I've created.  To watch the video, PLEASE CLICK HERE.  Thanks for stopping by!

Friday 21 July 2023

Square Frame Flower Card

Hello and welcome back!  I've got a simple card to share today - I'd like to say it is a CAS card, but I don't seem to know how to do that.  😅


Paper Rose Studio Supplies: Little Etched Butterflies Metal Cutting Die 25609, Etched Blooms 4 Metal Cutting Die 28939, Black & White A5 12pc Sentiment Sheets 19023, Stitched Square Frames Metal Cutting Die 16685

The background of this card was actually a gel print that I had done using some Cosmic Shimmer Shimmer Paints.  I wasn't happy with it and had put it aside quite a while ago, so I was more than happy to use it in this card.  I cut the background down to be 5.5" x 5.5" and glued that to a card base of the same size.  

I die cut the square frames from white card and layered them up.  There are two layers on the larger frame and three layers of the smaller one.  I glued these in place over the centre of the card.

I die cut 3 of the flowers from white card and glued the layers together.  This die has a base and then layers of petals that go on it.  I love the look of this flower!  I glued these in place, tucking the stem ends just under the square frame. 

I die cut the butterfly from white card twice, and coloured it with Copic markers (BG11, BG15 and YG21). I used a gold gel pen to colour the body and antennae.  I glued just the body and antennae of the two butterflies together and then lifted the wings of the uppermost butterfly when it was dry.  I glued the butterfly onto the centre square above the flowers.

The sentiment was foiled in my laminator with DecoFoil in Jade, but it is hard to see that in the photo.  I glued it into place just below the flowers.

Thank you for stopping by and I hope you're having a great day!

Wednesday 12 July 2023

Christmas in July!

Hello again!   Now, I know this may be early for some of you, but one of the themes this month at Paper Rose Studio is Christmas in July.  And since I've been making Christmas cards already on my other design teams, I thought it was only fair to make one for Paper Rose Studio. 😀

Paper Rose Studio Supplies Used: Crisp Christmas A5 12pc Sentiment Sheets 19772, Three Candle Circle Metal Cutting Die 26026, Aussie Christmas - Gum Leaves & Holly Circle Metal Cutting Die 27397 , Holly 6x6" Stencil 19721

Other Supplies: Liquitex Gloss Heavy Gel, Distress Ink in Festive Berries and Aged Mahogony, Distress Ink reinker in Festive Berries, Distress Glitter Dust, Cosmic Shimmer Luna Paste in Moonlight Pearl, Ranger Glossy Accents, microbeads.

I started this card by doing some ink blending with the Festive Berries Distress Ink on an A2 card front, and I tried to get a darker application out towards the edges.  Then I die cut the Three Candle Circle from the center of the card.  I also cut this from white card and just cut out the candle and leaves portion.  I coloured the candles with Copic markers, and applied the Luna Paste over the leaves.  Then I covered the candles with Glossy Accents and while it was still wet, I sprinkled on a little of the glitter.

I wanted some more interest on the background, so I created a paste from the Liquitex gel, Festive Berries, and a little of the Glitter Dust. 


I spread this paste over the Holly stencil and set it aside to dry.  Once it had dried, I applied the Aged Mahogony ink around the edges.  I hadn't thought about adding the Aged Mahogony prior to applying the paste, but that would have been better.  The Liquitex gel is very glossy so it gives a very pretty finish and the glitter dust just helped to add a little sparkle that matched the one on the candles.

On a piece of white card, I applied a light layer of the Luna Paste and let that dry.  I cut the Gum Leaves & Holly die from this, and again from white card two more times. I layered these die cuts up with the Luna Paste one on top.  I paper pieced the leaves back into the die cut by applying a small piece of cellophane tape to the back of the die cut and then inserting the die cut leaves.  Next, I glued this stacked die cut over the Three Candle circle on the card front.

I struggled with what to put in behind the candles, as gold mirror card was too shiny and white too boring.  Finally, I applied a layer of double sided adhesive over some gold mirror card, and covered this with microbeads, and pressed them in using the release paper.  This doesn't show up well in the picture, but in real life, there's a really fun texture behind the candles.

I glued the card front down to an A2 sized card base.  I used my laminator to foil the sentiment, using a satin gold foil. I trimmed this down and lastly, glued it to the circle just below the candles.

Thank you so much for joining me today, and I hope you are ok with a very early Christmas card!


Sunday 2 July 2023

Outside Tunnel Cards - New Design *VIDEO*

Hello and welcome! I've created my own design for an outside tunnel card and I'm sharing it with you today.  I always like cards with dimension, so these definitely checked that box for me. Here's a look at the cards I created in the video...


Ok, I know that last one isn't a tunnel card, but I did create it from the cutout centres of one of the tunnel cards.  The finished size of these cards are 4.25" x 5.5" when open, and 5" x 5.5" when flat.  So you would need a slightly larger envelope to fit these.  I have a complete list of supplies used in the video description.  I hope you'll come join me to see how these were made.  To see the video, PLEASE CLICK HERE.  Thank you for stopping by and I hope you're having a happy, creative day!


Wednesday 21 June 2023

Tulip Trifold Card

Hello everyone, I've got a trifold card to share today, but it could easily be just a regular card and I'll show you how.  This card is a little smaller than typical, measuring 4" x 5".


Paper Rose Studio Supplies:  Tulip Border 1 Metal Cutting Die 29674, Summer Picnic Die Cuts 29952, Stitched Ovals Metal Cutting Die 16551, Black & White A5 12pc Sentiment Sheets 19023, 19499 Clear Crystal Mix

I started making this card by watercolouring two panels on Bristol cardstock.  I used reds, yellows and some orange on one of the panels, and more blue, green and purple on the other one.  I added some Spectrum Noir Sparkle Ink in Crystal Clear, but you could easily add any shimmer pen or embossing paste instead.  If you don't want to make this into a trifold card, just choose one colour combination.  Once the paint was dry, I die cut the oval shapes (I used the third largest oval die in the collection ~ 3"x4"). I also cut 2 - 1" x 4.75" panels from each colour.  I also cut three more ovals from white cardstock to use on the inside.

Next, I cut two 4" x 5" card bases from a 10" x 4" piece of white 100# cardstock. If you want to make the trifold card, I trimmed the tiniest ~1/8" from the right hand edge of each card base (this just allows the card to fit together better when joined).  On the right and left edges of the card front, I attached the two border panels, leaving a small white border around the edges.  If you are making the trifold card, the second card will fold out from the opposite side (left to right), so the front panel of this card will be on the far right when the card is open.  

On the front of one of these card bases, I cut out the Tulip Border 1 die, centering the tulips in the middle of the card front.  Since the tulips cut into the watercoloured portion of the card, there will not be a white border there.  To get around that, I cut another of the Tulip Border 1 die from white cardstock twice and then fussy cut out the tulips.  It was quite easy to do this, but you could easily pencil in a cutting line first and then cut that out.  I glued this tulip outline over the tulip on the card front, and also on the blue one if you're making the trifold card.

Next, I placed the oval behind the tulips on the first (orange, yellow, red card) and glued it in place by adding glue to the backs of the tulips and along the outside edges of the oval where it met the right and left border of the card front.  If you are making the trifold card, just do this on the regular card front for now.  To determine the placement of the inside, center oval, I placed my card face down on my work surface, and placed one of the white ovals over the first oval with the good side facing down. I then added glue to the back of this oval, and making sure it was lined up with the already glued front oval, I carefully closed the card back and pressed the oval into place. Just check the front to be sure the ovals are definitely lined up correctly. 

At this point, you could choose to just leave this as a regular card, and then decorate the front and add a sentiment.  However, if you want to make the trifold, I attached the second card base to the front one by gluing the left hand side behind the first card base.  I still hadn't attached the oval behind these tulips, so I placed the watercoloured oval over the middle one in the first card base with the coloured side up.  I glued the back of the tulips on the second card base and just along the edges of the borders where the oval would attach.  Keeping the oval in place over the already glued center oval panel, I carefully closed the right hand card front and pressed it into place so the oval was now glued in place.  Just check again that you've got them lined up correctly.  Finally, I used the two extra white ovals I had cut to cover the inside of the watercoloured ovals as mine were quite messy from the ink.  Then I used the die cuts from the Summer Picnic set to decorate the left and right ovals. 

Finally, on the front, I attached the sentiment and added a few crystal drops from the shaker mix. Whew, if you've made it to this point, kudos to you for sticking it out! 😀  Thank you so much for joining me for this very lengthy explanation - I had intended to make a video as that would have been so much easier, but I just ran out of time. 


Monday 12 June 2023

Blossom Celebrate Card

Hello again, and welcome!  Today I've got a Celebrate card that while it's fairly generic and could be used for a number of occasions, it is definitely a feminine card.  I created this card in May, and in my part of Canada which is near the Rocky Mountains, spring tends to be a little slow in coming, so the blossom trees were all in bloom. 


Paper Rose Studio Supplies: Lovely Florals Blossom Flowers 4x6" Clear Stamp Set 18183Horizontal Border Metal Cutting Die 28396Hand Stitching Coverplate Metal Cutting Die 26020Celebrate Layered Metal Cutting Die 17454Little Foliage 2 Metal Cutting Die 21102.  

Other Supplies: Cosmic Shimmer Shimmer Paint AzureCosmic Shimmer Shimmer Paint Rose PinkCosmic Shimmer Shimmer Paint Pearl.

I started this card by colouring in the flower blossoms with Copic markers on Neenah Solar White cardstock (using RV55, RV52, RV000, YG01, YG03, YG17, E25).  I tried to leave as much white space as I could - something I'm not very good at doing!  I used a Sakura black gel pen to add in the black dots in the centres, and then fussy cut out the flowers. 

I die cut about 4 of the leaves in the Little Foliage die set from white cardstock and set those aside with the flowers.  I also die cut the Celebrate die 3 times from white cardstock and glued them together.

On my card front, I cut the Horizontal Border die from the top of the card.  I then lined up the Hand Stitching Coverplate die to cut just below where the border die had already cut.  

To create the pinkish background, I made a gel print using the shimmer paints listed above.  I know you can't see it in the photo, but those shimmer paints are very shimmery in real life, so there's a beautiful shine wherever the gel print shows through.    Once the background was dry, I cut out a piece to cover my card front, and I also die cut the Celebrate shadow from the same gel print.

Next, I layered the white die cut front over the gel print background, and then arranged the flowers and leaves over the top of the card.  I popped some of the flowers up on scrap card to give a little more dimension.  Finally, I glued the white Celebrate word to the shadow background and attached it to the bottom of the card. 

Thank you for joining me today and I hope you are having a great day!

Friday 2 June 2023

5 Cards from Patterned Paper and a New Fun Fold Technique *VIDEO*

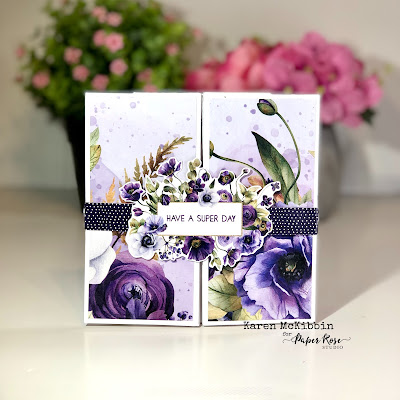
Hello everyone, I've got five cards to share with you today and a fun, new card fold.  Paper Rose Studio have just recently released the "Dear Isabella" papers, and I just fell in love with them.  They are gorgeous! And no colouring is required! 😄 The first three cards are quick and easy to do, and the last two use the fun fold technique I show in the video.  Here's a look at the cards, starting with the three easiest.

Paper Rose Studio Supplies: Dear Isabella 12x12 Paper Collection 29802, Doodle Flower Coverplate 20553, Greenery 1 Metal Die 25966 


Paper Rose Studio Supplies:  Dear Isabella 12x12 Paper Collection 29802, Doodle Flower Coverplate 20553.  Also, Ranger Frosted Crystal Embossing Powder

Paper Rose Studio Supplies: Dear Isabella 12x12 Paper Collection 29802,  Flourish Circle Metal Die 26917, Black & White Sentiment Sheet 19023.  Also, Ranger Frosted Crystal Embossing Powder.

Isn't that paper beautiful?!  Here are the next two cards that use the fun fold technique, and I promise you it's not a difficult card to make.

Card closed with a belly band

Open card showing the inside box

Back of the card with space to write a message.


And here's the fifth card ...


If you would like to know how I made these cards, please come join me as I have made a video to share the making of these cards.  To see the video, PLEASE CLICK HERE.  

Thank you so much for joining me and I hope you like the video.


Sunday 21 May 2023

Welcome to the Neighbourhood Card

Hello everyone, I've got a Welcome to the Neighbourhood card to share today, but it could just as easily have been a new home style card.

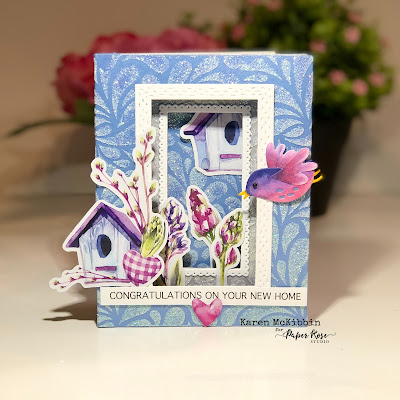
Paper Rose Studio Supplies used: Bird Houses Metal Cutting Die 21210, Tree of Love Metal Cutting Die 28825, All Occasions Sentiments A5 12pc Sentiment Sheets 22339, Watercolours - Sublime 12x12 Paper Collection 26440

I started my card by ink blending in a light blue on the card front, and just left some areas in white to look like clouds.  

Next, I die cut the bird houses from some of the watercolour papers and also from white.  I also cut several of the birds from white cardstock and used Copic markers to colour them in.  I coloured them all the same except for the one purplish bird so it would look like he was the newcomer to the area.  I feel I have to point that out as it doesn't seem terribly obvious to me!  :)

The tree trunk was also cut from white cardstock and I used Copic markers to colour it in.  I cut the leaves from the watercolour papers. The grassy border was also freestyle cut from the watercolour papers and I thought it had the perfect grassy look. 

To assemble the card, I started by gluing the tree in place and adding the leaves.  Next I added the grassy border, and then the birdhouses.  Finally, I added the birds and the sentiment which I popped up on foam tape. 

Thanks for joining me again today!


Friday 12 May 2023

Welcome Baby Card

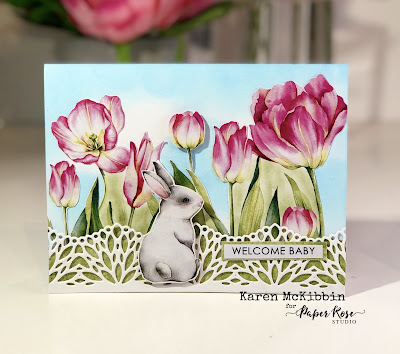
Hello and welcome!  Today I've got a baby card to share with you, as I thought the bunnies in the Garden of Hope collection were sweet enough to use in a baby card.


 Paper Rose Studio Supplies:  29458 Garden of Hope E 12x12 Paper, Layered Pinwheel Lace Border Metal Cutting Die 20973, All Occasions Sentiments A5 12pc Sentiment Sheets 22339 .


To create this card, I did some ink blending on the card front, using a light blue ink and just leaving little white areas for clouds. I fussy cut out the bunny and the flowers from the Garden of Hope papers.  Where there was white cardstock showing around the stems, I lightly ink blended some Catherine Pooler ink in Eucalyptus around the stems.  I glued the flowers down to the ink blended background, and popped the center flower bud on foam tape before adhering it.  

I die cut the Pinwheel border from white cardstock twice, and glued these together for dimension, using a spray glue.  I used the same Eucalyptus ink to colour a piece of white cardstock to put behind this border, as it helped disguise the fact that the flowers didn't quite reach the bottom. I glued all this in place at the bottom, and then popped the bunny up on foam tape and adhered him in place.  Finally, I used the same ink to make a mat for the sentiment and then glued it in place over the border.

Thank you for joining me today and I hope you're having a great day!


Tuesday 2 May 2023

Peek A Boo Shaker Cards *VIDEO*

Hello again,  I've got a couple of Peek A Boo shaker cards to share with you today.  These are fun shaker cards to make because you can have a little surprise inside the card for the recipient.  Here's a look at the first of my cards...


And here is the second card ...


Paper Rose Studio Supplies Used:  28477 Elodie Flower Building Die, 19499 Clear Crystal Mix, Bee Happy 12x12 Paper Collection 27706, Black & White A5 12pc Sentiment Sheets 19023, Cracked 6x6" Stencil 19298, Stitched Rectangles Metal Cutting Die 16575,  Birthday Layered Metal Cutting Die 18297, Hand Stitching Coverplate Metal Cutting Die 26020.  Other supplies: Heartfelt Art Foam Paper or Foamiran sheets, Shrink plastic, gold mirror card.


So you can see I've added some fun sentiments inside, but it could just as easily have been a bigger picture or other embellishments.  I've made a video for you showing how I made these cards, so if you want more details, please CLICK HERE.

Thank you for stopping by, and I hope I've given you a little inspiration today!