Wednesday 29 July 2020

Thank You for Watching the Dog

Hello and welcome back!  Life has been so busy here with our new puppy, so this card today is going to come in handy for sure! I’ve used the new stamp set from Gerda Steiner Designs for this one, called  “Puppy Mail”.


I first stamped and coloured in my images with copic markers. I also used the image from the “I Just Miss You”  set. This is also available as a digital set, so it’s easy to resize to your card front. I love how all these images so clearly show different moments in a puppy’s day. 

On my card front, I used the larger circle die in the Panel Shapes die set from Your Next Stamp because I liked that it cut the stitched line around it. I cut out four circles, leaving room for my sentiment. I found a dog paw stamp in my stash and stamped it randomly over the card front in black Versafine ink. 

I placed the card front over my card base and lightly pencilled in the circles. I used a larger circle die to cut out my images, and then adhered them with glue over the pencilled areas. I decided not to pop my card front up with foam tape, but I do think that would look very nice. 

I used the sentiment from the Puppy Mail set and stamped it on some white cardstock. I used a fishtail die to cut it out and then mounted it with tape to a piece of blue cardstock. I fussy cut the blue cardstock to leave a small border along the top and bottom, and then adhered this to my card front and trimmed the excess from the right hand side. 

This was a really quick and simple card to make but such a handy one to have in your stash if you’re a dog owner.  I know I’ll be using it! 


Wednesday 15 July 2020

Gerda Steiner's Birthday Bear Pop Up Box Card

Hello and welcome, I’m back again with another card featuring the Birthday Bear stamp set from Gerda Steiner Designs. This is such a fun, festive stamp set and I thought these characters would go well in a pop up box card. I’ve kept the front of my card quite simple because the fun is really on the inside.


I’ve made a short video to show you how to make this card, so if you would like to see the video please CLICK HERE.


I created the front of my card first by die cutting a cover panel from MFT’s Four Way Chevron die (you could use any cover die in your stash for this). I saved the inset pieces and copic coloured them with a mix of orange to yellow markers.  I cut a piece of Die Cut N Bond to cover the back of the panel and then replaced the coloured pieces back into the frame. 

I had already coloured my images with copic markers, and I’ve listed the markers used below. I created some coloured cardstock for my sentiment by colouring white cardstock with one of the copic markers that I had used on the chevrons. I die cut a circle out of this, stamped the “Happy Birthday” sentiment onto it and heat set it with clear embossing powder.  I added a thin line of BoBunny rose gold glimmer paste around the outside of the circle and let it dry. 

After removing the backing from the Die Cut N Bond, I adhered the cover panel to the front of my card and pressed it into place.  Then I adhered my circle sentiment, popped the bear up on foam tape and adhered him to the sentiment circle. 

For the inside of the card, I die cut the Lawn Fawn pop up box and crossbars out of Neenah 80# cardstock.  I created my own coloured paper with some Nuvo shimmer powders, but you could use patterned paper, foil cardstock, glitter paper or really anything else you have on hand. From this shimmer paper, I cut the rectangle panel pieces and a selection of streamers, twirly bits, hearts and stars that are included in the pop up box die set. 

I placed double sided adhesive on the triangular flaps of the box and on the small flap as well as on the ends of each crossbar. Using a bone folder, I creased all the folds.  The crossbar pieces are attached by removing the backing paper from one end and evenly spacing the crossbars along the first box side adjacent to the small fold. Once these are adhered, I fold them all down towards the long side of the box, remove the backing paper from the other end of all the crossbars as well as from the small side flap. Then I fold the other half of the box up to meet the side flap and press everything  down. Now the box is ready to decorate! 

After attaching strips of scrap acetate to the backs of my images and to the streamers and twirly bits, I used double sided adhesive to attach them to my box. Once the box is decorated, I stamped my inside sentiment on my card base as it is easier to do this before attaching the box. Next, I attached the box to the inside of the card by lining one triangular flap along the fold line of the card base and then aligning the second triangle with this one. I find I need to keep folding the box and card base down several times, guiding it into position and creasing all the folds with my fingers and a bone folder. It really will do it on its own after being manipulated several times.

It may seem like a lot of work at first, but these pop up boxes have such a big, fun impact that I love to add them into my cards. I hope you will give this one a try! 

Copic Markers used:
BEAR - E79, E59, E57, E35, E53, E51 R00, R20
BUNNY - W1, W2, W3, E40, R00, R20
BANNERS - RV04, BG13, Y17, YG03, Y08
BALLOON - YG67, YG17, YG03


Wednesday 1 July 2020

Glittering Birthday Bear and Friends

Hello everyone, it’s Karen here today.  I’m back with another card made using the adorable Birthday Bear stamp set.


If you would like to see a video of how I made this card, please CLICK HERE
or you can see it in lower resolution here:


I copic coloured my images first (the marker colours used are listed below), and applied glossy accents to the banners, birthday hat, and the balloon. I set these aside to dry. 

I cut a background cover die from Sunny Studios called Frilly Frames Retro Petals out of #110 white cardstock (you could use any cover die with openings in it).  I saved the small die cut petals to later fill back in to the openings. I covered the back of my die cut frame with DieCut’N Bond which is a double sided adhesive. You could probably use any strong double sided adhesive such as Stick It for this technique. On the front of my frame, I filled in most of the openings with the saved petals, to make a pleasing pattern. The unfilled areas were mostly in areas where they would be seen behind the Birthday Bear characters. 

I found micro glitter at my dollar store (as well as containers to store it in), but any micro glitter would work. I’m not sure if chunky glitter would stick in this technique. I masked off all the petals but one, and carefully applied a small amount of glitter to my first petal and rubbed it in with my finger, slightly pressing it down. Then I used a bone folder to really press the glitter to the adhesive. I used a Swiffer cloth to wipe up the excess as well as a brush. This is quite a messy technique, so I also keep a sheet of printer paper beneath my work. I continued filling in all the petals, using a different colour for each one. This is such a fun, sparkly background in real life and just perfect for a birthday party theme. If you didn’t want to do the glitter technique, the background openings could be filled with alcohol ink pieces, copic or watercolour pieces or even patterned paper. Lots of possibilities! 

For the sentiment, I die cut a border using a Sunny Studio Heartstrings border die which I thought coordinated well with the petals. I stamped the “Happy Birthday” sentiment from the stamp set and clear heat embossed it. I trimmed it down to just cover the bottom of my frame and mounted it on foam adhesive. I applied foam adhesive to the back of my images as well, and then mounted them along the border sentiment. 


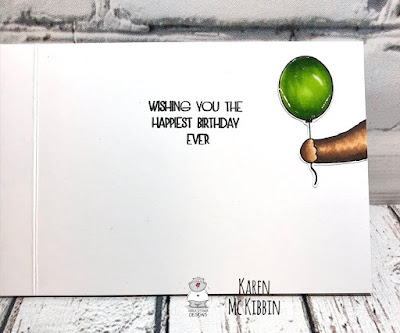
On the inside of the card, I stamped the sentiment from the Birthday Bear stamp set and added that super sweet bear arm with the balloon. I love that arm! 

This is a really fun birthday card with a very festive, party feel to it and I hope you’ll give it a try! 

Copic Markers used:
BEAR - E79, E59, E57, E35, E53, E51 R00, R20
BUNNY - W1, W2, W3, E40, R00, R20
BANNERS - RV04, BG13, Y17, YG03, Y08
BALLOON - YG67, YG17, YG03