Sunday 23 June 2019

Avery Elle - Hello Chum Underwater Card

Hi there!  I’m sharing my last beach themed card for this first week of the Daily Marker Challenge.


** If you would like to see an HD video on youtube of how I made this card CLICK HERE


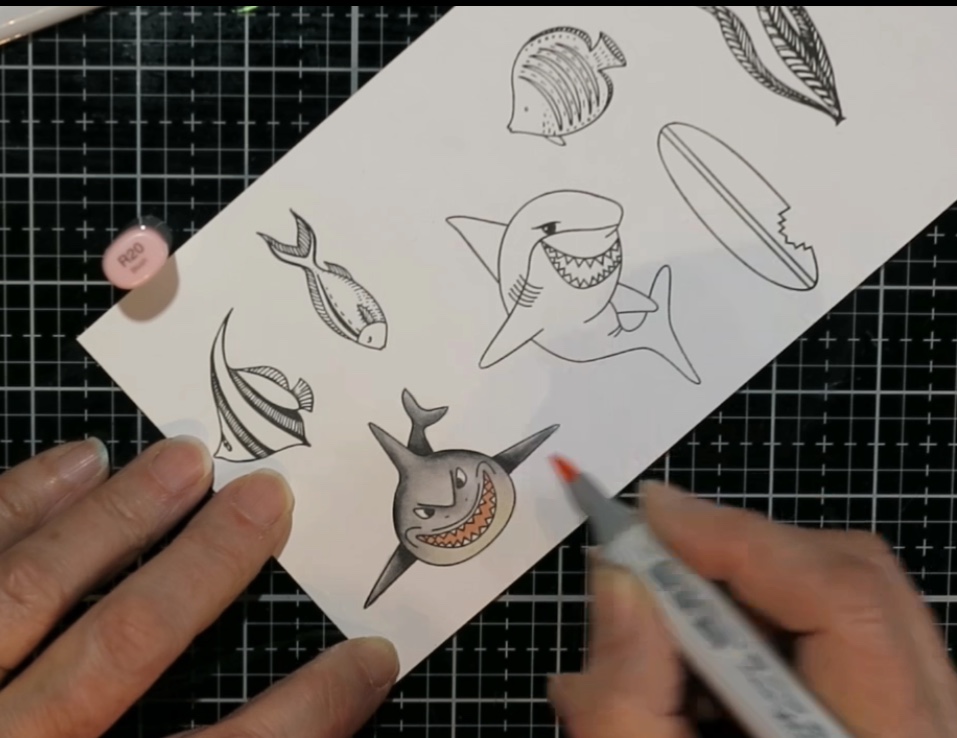
I started by stamping out the sharks and fish onto 110 lb cardstock using copic friendly ink.  I coloured in the images with copic markers and then die cut them out.


To make the background, I started with white 110 lb cardstock.  I used a scrap piece of acetate packaging to first stamp my Distress Oxide inks onto.  Then I sprayed 2-3 spritzes of water onto the ink before applying it to the paper.  I used Cracked Pistachio, Mermaid Lagoon, Shaded Lilac and a little Peacock Feathers. I worked with one colour at a time and just turned my acetate scrap over so I could see where I was applying it on my card base.  I heat set each colour after applying it. 


 When I was satisfied with the background, I stamped on the reef image from Kaisercraft, using Stormy Sky Distress Oxide ink.  I then lightly coloured in the image with copic markers, using muted shades to help give it the look of being underwater.


Then I temporarily positioned my die cuts where I wanted them to go on the front, and  placed my sentiment where it would fit.  I stamped the sentiment with Chipped Sapphire Distress Oxide ink.  I had to stamp it several times to get it dark enough, so I was glad I had used my stamp positioner for this!  I then adhered my card front to my card with a tape runner, and used extra adhesive as the paper had warped slightly from the ink smooshing.

Finally, I arranged the shark and seaweed I had reserved for the inside of my card.  I then stamped the "birthday cake!" sentiment in black Versafine ink on the inside and glued down the diecuts on the inside.

All that was left to do was to glue down the die cuts on the front of my card, add black glaze pen to the fish eyes, and glossy accents for bubbles coming out of the fish mouths.


 Thank you so much for stopping by!

Saturday 22 June 2019

Your Next Stamp - Waddles Beach Fun

Hello everyone!  Hope you’re all having a great weekend. I’m sharing this card today which was made with these sweet penguins from Your Next Stamp - Waddles Beach Fun. The background die is from Hello Bluebird and is called Sunshine  Scene. The sentiment is from Simon Says Stamp CZ Designs Stop, Drop, Party - this is such a fun birthday sentiment stamp set!


 I die cut the background die from white 110 lb. cardstock. I decided to make that bottom layer of cloud into water, so ink blended it with a combination of Distress Oxide Mermaid Lagoon and Peacock Feathers. 


The sun and rays were done with Wild Honey and Spiced Marmalade Distress Oxide inks. I found it easiest to adhere the rays to some blue painters tape that was folded back on itself with the sticky side up.  That way they stayed in place while I blended the inks.  I only applied the spiced marmalade ink to every other ray.  Once everything was ink blended, I adhered the pieces into the frame which I had already mounted to my card base.  After making sure the ink was dry, I used an anti-static powder tool on the blue water and white heat embossed my sentiment.  This was a super quick background! 

I copic coloured the penguins, and if you're interested, the colours I used are listed below.  I fussy cut out the penguins and mounted them on foam tape and finally adhered them to my card front. 

Penguins:  N6, N4, N2, and Y17
Floating tube: RV13, RV 23
Surfboard:  YR16, RV17
Shorts: YG17, YG13
Water: B04, B02

Thank you for stopping by!


Saturday 15 June 2019

Lawn Fawn Beach Scene


Hi again, I hope everyone is having a great weekend!  For today’s card I’ve used the two foxes from Lawn Fawn’s “Upon a Star” set, and their adorable “Set on the Beach” stamp set.  I love all the little extra items in this set right down to a bottle of sunscreen!

I thought the fox family would probably enjoy surfing - not sure why! I made the surfboards by just freestyle drawing them and cutting out a template.  Honestly, it was really fun to try different patterns for all the surfboards. I think leaves, flowers, hearts, stripes would all work well. Whatever you can find in your stash.  Here's a quick video showing how I made them.


To create the ocean water I ink blended on white cardstock with Distress Oxide inks in Cracked Pistachio, Peacock Feathers and Mermaid Lagoon.  I die cut the wave form using a wave die from Sunny Studios and then splattered some Distress Resist Spray on it.  Make sure you do this in a box because this stuff is hard to remove!  Once that was dry, I ran a clear Versamarker pen along the top of the wave and added white embossing powder to get the look of watery foam.


I used Copic markers to colour in all the stamped items and have listed the markers I used below.  I am not a Copic certified person or an artist, so I don't feel qualified to really tell you how to colour these in.  However,  I have some pictures below showing how I like to colour in the fox (I apologize for the poor lighting!).  I try to start with dark to light markers and I go over my first colouring, so here's how that looks for me:
E39 where the deepest shadows would be.

YR27 to fade in from the deepest shadows.


E13 for the lightest areas on his face, tummy and near the tip of his tail.

E39 Second layer

YR7 Second layer

E13 Second layer

CO to darken the shadows in the white areas

R00 and R20 for the inner ear and blush on his cheek.
Here's the list of markers that I used for this card:
Foxes:  E39, YR27, E13, R00, R20, C0
Umbrella: BG49, BG13, B04, B02
Towel:  B04, Y08
Sunscreen: BG10, Y08, C0, C3
Coconut:  E57, E23, E31

On my card base, I stencilled on some clouds using MFT's Cloud stencil with Distress Oxide Mermaid Lagoon. Then I foam mounted the ocean and sand layers and adhered them to my card base. Lastly, I glued down all my coloured elements where I wanted them to go.


For the sand, I added some glue and smudged it around with my finger, then sprinkled on the Flower Soft sand product.  I found this in New Zealand a couple of years ago, so I'm really not sure where, or if, you can find it now.  It really does give the look of sand as you can see in the picture.


Thanks for stopping by!

Wednesday 12 June 2019

Waffle Flower Bouquet Builder

Hi and welcome to my new blog - I’m excited to share my favourite hobby with you!

I received my Mother’s Day mail order this week and the first thing I wanted to try out was this amazing Bouquet Builder stamp and die set from Waffle Flower. This is a BIG bouquet of flowers and there are several additional flowers and leaves that can be added into the bouquet. The die that comes with the set is amazingly intricate and actually cuts out the little bits between the stems and leaves.

I decided to stamp and colour this bouquet using 5 different methods but to try to keep the colours as similar as possible. I also made all the cards into thank you cards.

This first card was made using the Zig Clean Colour brushes. I applied a little of the markers to the darkest areas of the flowers and then used a wet paintbrush moving from the lightest areas into the areas where I had applied the markers. Since these markers are filled with watercolour, the water helps to move the colour into the unpainted portion of the flower. I embossed the background panel with a Kaisercraft Striped embossing folder, and mounted my bouquet on foam tape and applied it to the panel. I used a Nuvo shimmer pen to add some shine to all the flowers.
Card 1 - Zig Clean Colour 

The second card was done with Copic markers. This card has the most vibrant colour of all the cards. I die cut the background frame and ink blended it with Distress Oxide Picked Raspberry. I tied a little bow around the stems and added a small tag stamped with Thank You. I added in extra flowers from the set so it’s quite a busy bouquet! 
                                                 Card 2 - Copic Markers

 The third card was done in Prismacolour pencil crayon and I used some Gamsol after colouring it in to help blend the colours.  I mounted the bouquet on foam tape and adhered it over a white die cut panel.  The background panel behind the white die cut panel was ink blended lightly with Distress Oxide Picked Raspberry and then sprayed with Sparkle Shimmer Spritz from ImagineCrafts.  It has a beautiful shimmer to it in real life.

                                          Card 3 - Prismacolour Pencil crayon

The fourth card was done in watercolour and I will apologize right away to all the true watercolour artists out there! This is my weakest medium for colouring but I was determined to give it a try.  I did a no-line technique for this one and used my Migellin Mission watercolours. The background panel is a soft minty green cardstock I had in my stash.  I stencilled on some Nuvo Moonstone glimmer paste and this panel has a beautiful sparkle to it.  I love this Nuvo glimmer paste for stencils! I then die cut the bouquet and adhered it to the background on foam tape and added a little ribbon and sentiment.

                                       Card 4 - Migellin Mission watercolour

The final card is actually just a Thank You notecard and I just embossed the bouquet on white cardstock using Stampendous Pearlustre Moonstone embossing powder  I really like this gold powder as it is not a brassy gold.
                                   Card 5 - Stampendous Pearlustre Moonstone


So there you have it, my first post!  If you have any suggestions for me, please pass them on. I'm so totally new to all this and would appreciate feedback.