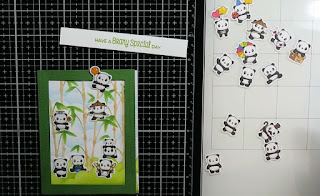
Little Panda Agenda Pop Up Box Card
Hello again and welcome! I want to share this pop up box card with you. It’s made with Mama Elephant’s “Little Panda Agenda” stamps. These little guys are adorable and really, they’re already halfway coloured! If you’re unsure about your colouring, these are great stamps for you.
If you would like to see a video of how I made this card in HD, Click HERE.
I started with the front of my card by creating a frame from the Wonky Rectangles dies from MFT out of green cardstock I also cut the clouds from Hello Bluebirds Sunshine Scene die from white cardstock. I ink blended these with Altenew Bamboo and Olive inks to make my "hills". Finally, I die cut bamboo canes from white cardstock with a die from Memory Box called Bamboo Poles. I coloured in the canes with Copic markers in YG03, YG17, and E53.

Next, I used Mermaid Lagoon Distress Oxide ink and MFT's cloud stencil to make my background for the front of the card. I used the largest wonky rectangle die to cut this out so it was the same size as my green frame.
I stamped my sentiment onto white cardstock using the Altenew Bamboo ink. I added foam tape to the first row of hills and along the sides and top of my green frame. Then I positioned all my elements where I wanted them to go on the front and adhered them with glue. I couldn't find a good spot for my sentiment as the front was quite busy, so I fussy cut it out and glued it to the bottom centre of the frame.
On the inside of my card, I die cut a pop up box from Lawn Fawn's Mini Pop Up Box die set out of green cardstock. Lawn Fawn has a great video on how to assemble this box if you wish to see it HERE . Instead of colouring on the outside of the box, I chose to emboss it with a bamboo embossing folder from Craft Concepts. On the back of each of the pandas I had chosen to go on the inside of the box, I placed double sided tape. Then I adhered scrap strips of acetate (saved from packaging) to the backs of all the pandas. Next, I positioned all my pandas in the box, attaching them to either the back of the box or to the cross strips. You need to be careful that you don't place the double sided tape below the cross strips or your box will stick together when the card is closed. I like to position my element where I want it to go, and then feel with my left hand from the bottom up to where the cross strip ends. I hold onto this point on the acetate and then pull the element down out the bottom of the box. This is where I trim off the acetate and then I just put a little piece of double sided tape here.
I prefer to stamp my sentiment on the inside before I adhere the pop up box. To do this, I place the pop up box with the long edge of the bottom triangular tabs running along the crease of my card and roughly centered. Then I can see how far down to place my sentiment. All of my sentiments on this card are from MFT'S Birthday Bears stamp set.
Once I had the inside of my box filled, I removed the double sided tape that was on the bottom triangular tabs and lined these tabs up along the fold of my card. You want to be sure that you are also keeping the box along the vertical centre line. I try to lightly position one tab at a time along the crease, and then bring the other tab up to its position along the fold line. Then I press down on the tabs to be sure they are well adhered. After this, I had to open and close the card several times, just coaxing and helping the box to fold along its crease lines. It never feels like it will go down at first, but after several opening and closing movements, and creasing with a bone folder, it will go on its own.
Thanks so much for stopping by and I hope this helps you to be creative!


No comments:
Post a Comment