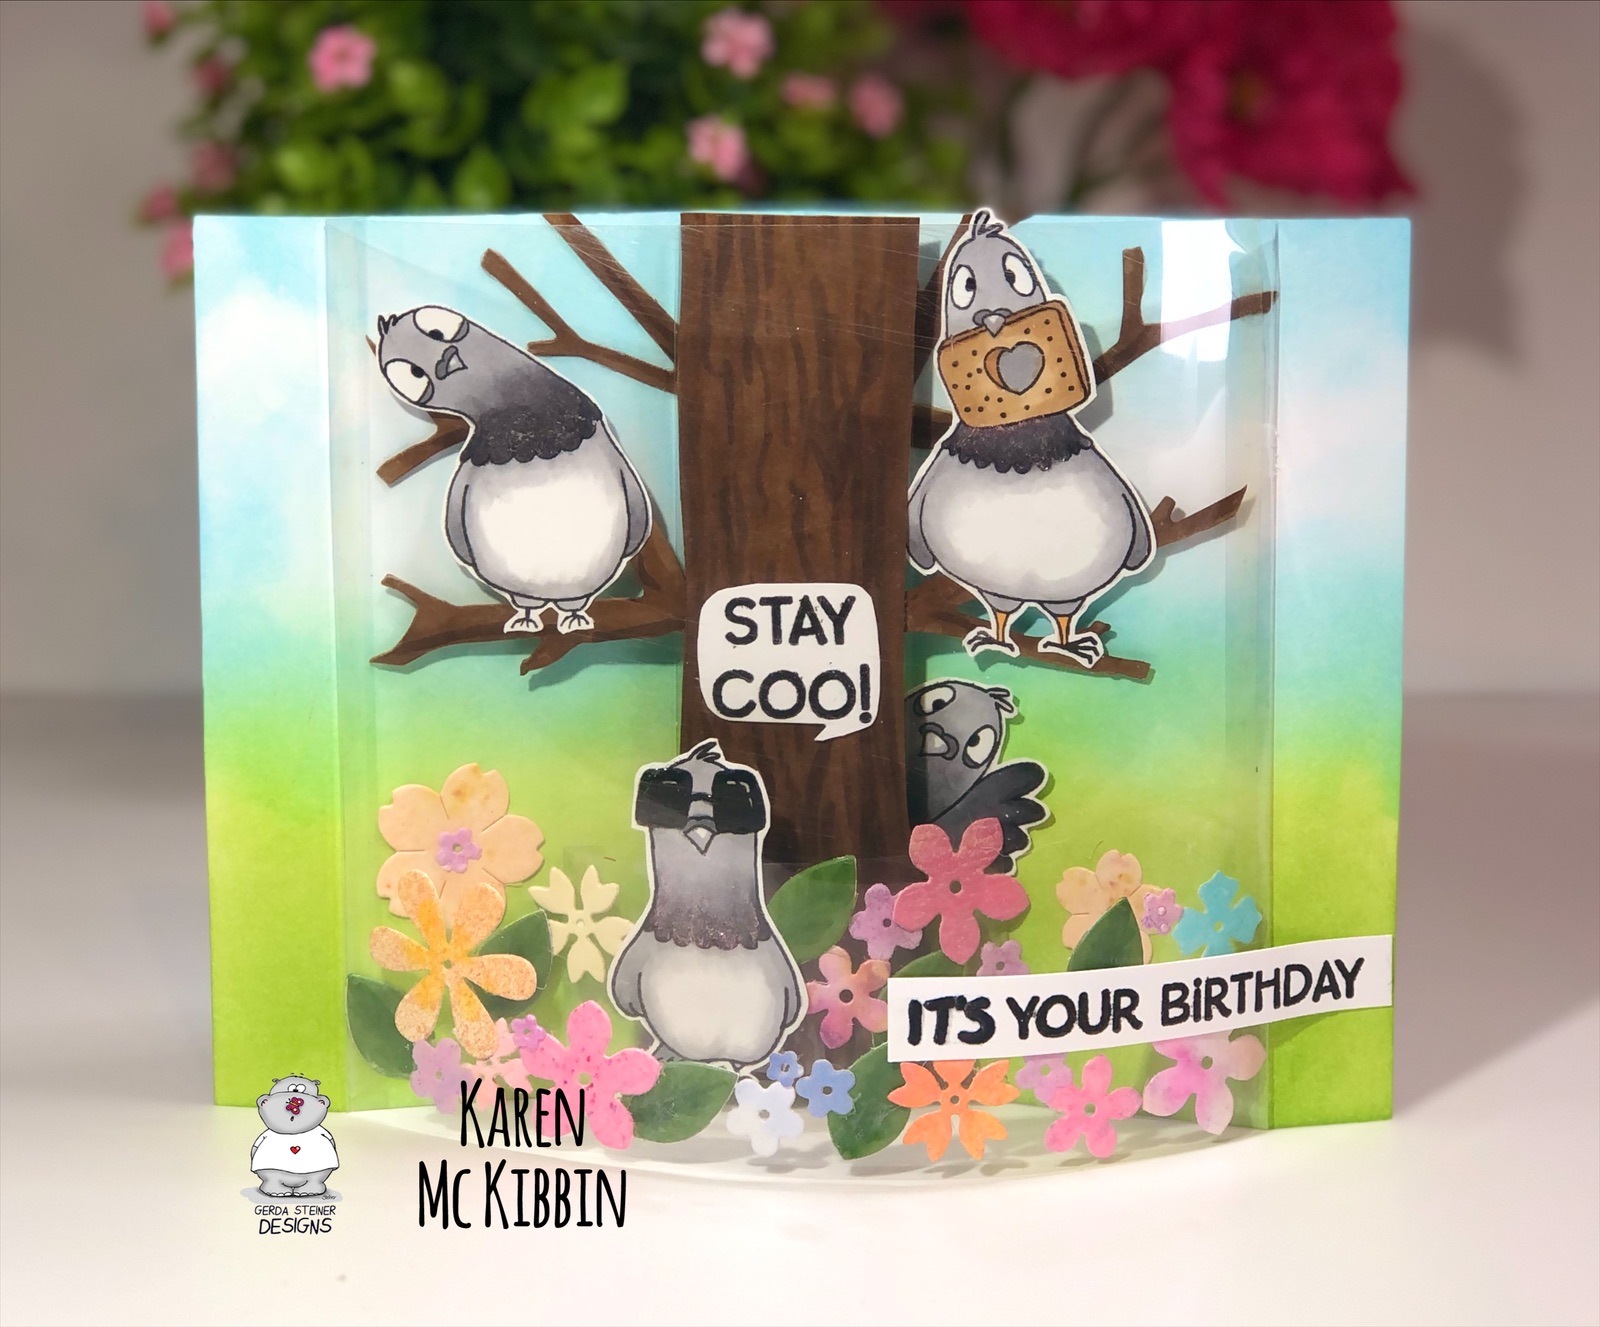
Hello everyone! I’ve got a fun new card fold idea for you today, using the adorable “Pigeons” stamp set from Gerda Steiner Designs. This is a 5” x 7” card that folds flat, but pops out to create a 3D card when it comes out of the envelope. There’s room on the back of the card to write a message and to decorate if you want. I have to give a shoutout to Sam Calcott of Mixed Up Craft
who I first saw make this style of card. I've got a link in the video
description to her video which is well worth seeing. Here’s a look at
my card.
Showing posts with label Pigeons. Show all posts
Wednesday, 18 May 2022
Pigeons Acetate Bendy Card with *Video*
Back of the card
Bottom view of the card showing dimension
I’ve made a video for you to show how this card was made. There are no special dies required, and it’s really not a difficult card to make. But it does have lots of dimension and a little bit of movement of the pigeons. So if you would like to see the video, please CLICK HERE.
Thank you so much for stopping by and I hope you’re having a fun, creative day!
Wednesday, 20 April 2022
A Toast to You
Hello and welcome! I’ve got another pigeon card today featuring the new Pigeons stamp set from Gerda Steiner Designs. Here’s a look at my card and since it’s an interactive one, there’s a shot of before, and after, you pull the tab (this is a 5 1/2” square card).
To create the card, I started by colouring in the pigeons with Copic markers and fussy cutting them out. For the background, I used a stencil from TCW called Aspen Trees, and added some Distress Oxide shading in Evergreen Bough, Twisted Citron and Tumbled Glass. I then added a little shading to the trees with a C0 Copic marker as they looked a little stark. I cut the hilly foreground from some green cardstock, and added some Copic marker dots under the pigeons feet. The sentiment is actually from another new stamp set by Gerda Steiner Designs called “Toast to You”, and I stamped it in black Versafine ink and then clear heat set it. The tree was made from a set of cloud dies for the leafy parts cut out of green cardstock scraps, and the trunk and branch were cut from brown cardstock using a Bigz die from Sizzix by Tim Holtz called “Branches”. I used the “Swish ‘n Pop Pull Tab” die set from Lawn Fawn for the interactive mechanism, but I modified it to have the pigeon appear from the left hand side. I’ve done a previous video showing how to modify it, so if you’re interested, you can find it here. The branch and pigeon with the toast are actually attached to the clear, acetate arm of the interactive mechanism, so are separate from the tree. I used foam tape in a double layer to pop up the hilly foreground and tree in order to hide the mechanism, and to allow the swing arm to move.
Thank you so much for stopping by and I hope you’re having a great, crafty day!
Wednesday, 6 April 2022
Pigeon Trouble
Hello and welcome back! Today I’ve got a card featuring a new stamp set by Gerda Steiner Designs called “Pigeons”. There are five pigeons in this set, and you just know they all have fun, expressive faces! Here’s a look at the card I made.
I coloured in the pigeons with Copic markers (N6, N4, N2, N1, N0). To add the interference sparkle to their necks, I used some Cosmic Shimmer Opal Crush Polish in Golden Blackberry. It doesn’t show up very well in the picture, but there really is a nice sparkle and hints of purple and green on their necks.
For the background, I used some Distress Oxide Ink in Tea Dye and Mowed Lawn to create the foreground on my card front. I added in some grass and pebbles with Copic markers. I used Colour Cloud Ink in Clear Day to freestyle add a sky and some clouds. The trees (Memory Box - Alpine Trees) were inked up with Distress Oxide Ink in Rustic Wilderness.
I stamped and clear heat embossed the sentiments which are in the stamp set. The pigeon on the left was glued in place. I mounted the two pigeons on the right on foam tape and positioned them on the card front. Finally, for the pigeon droppings, I added some Cosmic Shimmer Fluffy Stuff and heat set it. Once it was dry, I added a little N4 Copic marker to it. Don’t you just love the expressions on those pigeons?!
Thank you so much for stopping by and I hope you’re having a great day!
Subscribe to:
Comments (Atom)


