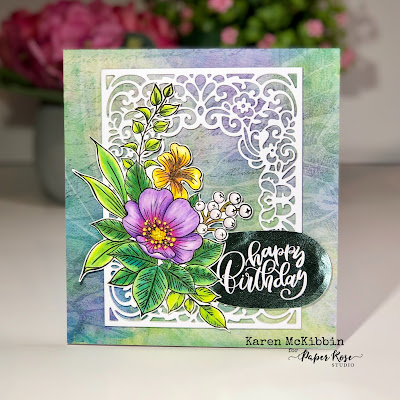
Supplies Used: Hayley's Bouquet Clear Stamp 25240, Spring Floral Frame Metal Cutting Die 21054, Sketchy 6x6 Paper Collection 25252, Big Sentiments 1.0 A5 12pc Sentiment Sheets 22336, copic markers, yellow Prills (flower center), Minc Reactive Foil in Mint.
Hello everyone and welcome back! For today's card, I started by stamping the floral image onto some Neenah 80# Classic Crest cardstock in Solar White, using a Copic marker friendly black ink (I used Gina K Amalgam ink). I coloured the image in and then added some yellow Prills to the centre of the purple flower. The Prills just add a great 3D effect, but you could also use Copic markers and some Glossy Accents to get a similar effect. Once it was dry, I fussy cut the image out.
I cut the Spring Floral Frame three times from white cardstock and glued them together for dimension. My card is 5.5" x 6" because I didn't want to cut too much off that beautiful Sketchy paper. But that allows the floral image and the sentiment to hang off the side of the background diecut. So after adhering the trimmed down piece of Sketchy paper to my card front, I glued the layered background die over the center.
I lightly traced an oval shape around the black version of the sentiment and fussy cut it out. I foiled the sentiment with the Mint foil in my laminator, running it through two or three times before peeling off the foil. I'm not really sure if that helps to run it through so many times, but it makes me feel better! :-)
Finally, I glued the sentiment to the background diecut on the card front, and popped the edges up on foam tape. I then glued the floral image over the background diecut, and also put some foam tape under the edges that extended past the diecut.
I hope I've given you a little inspiration today, and thank you for stopping by!


No comments:
Post a Comment