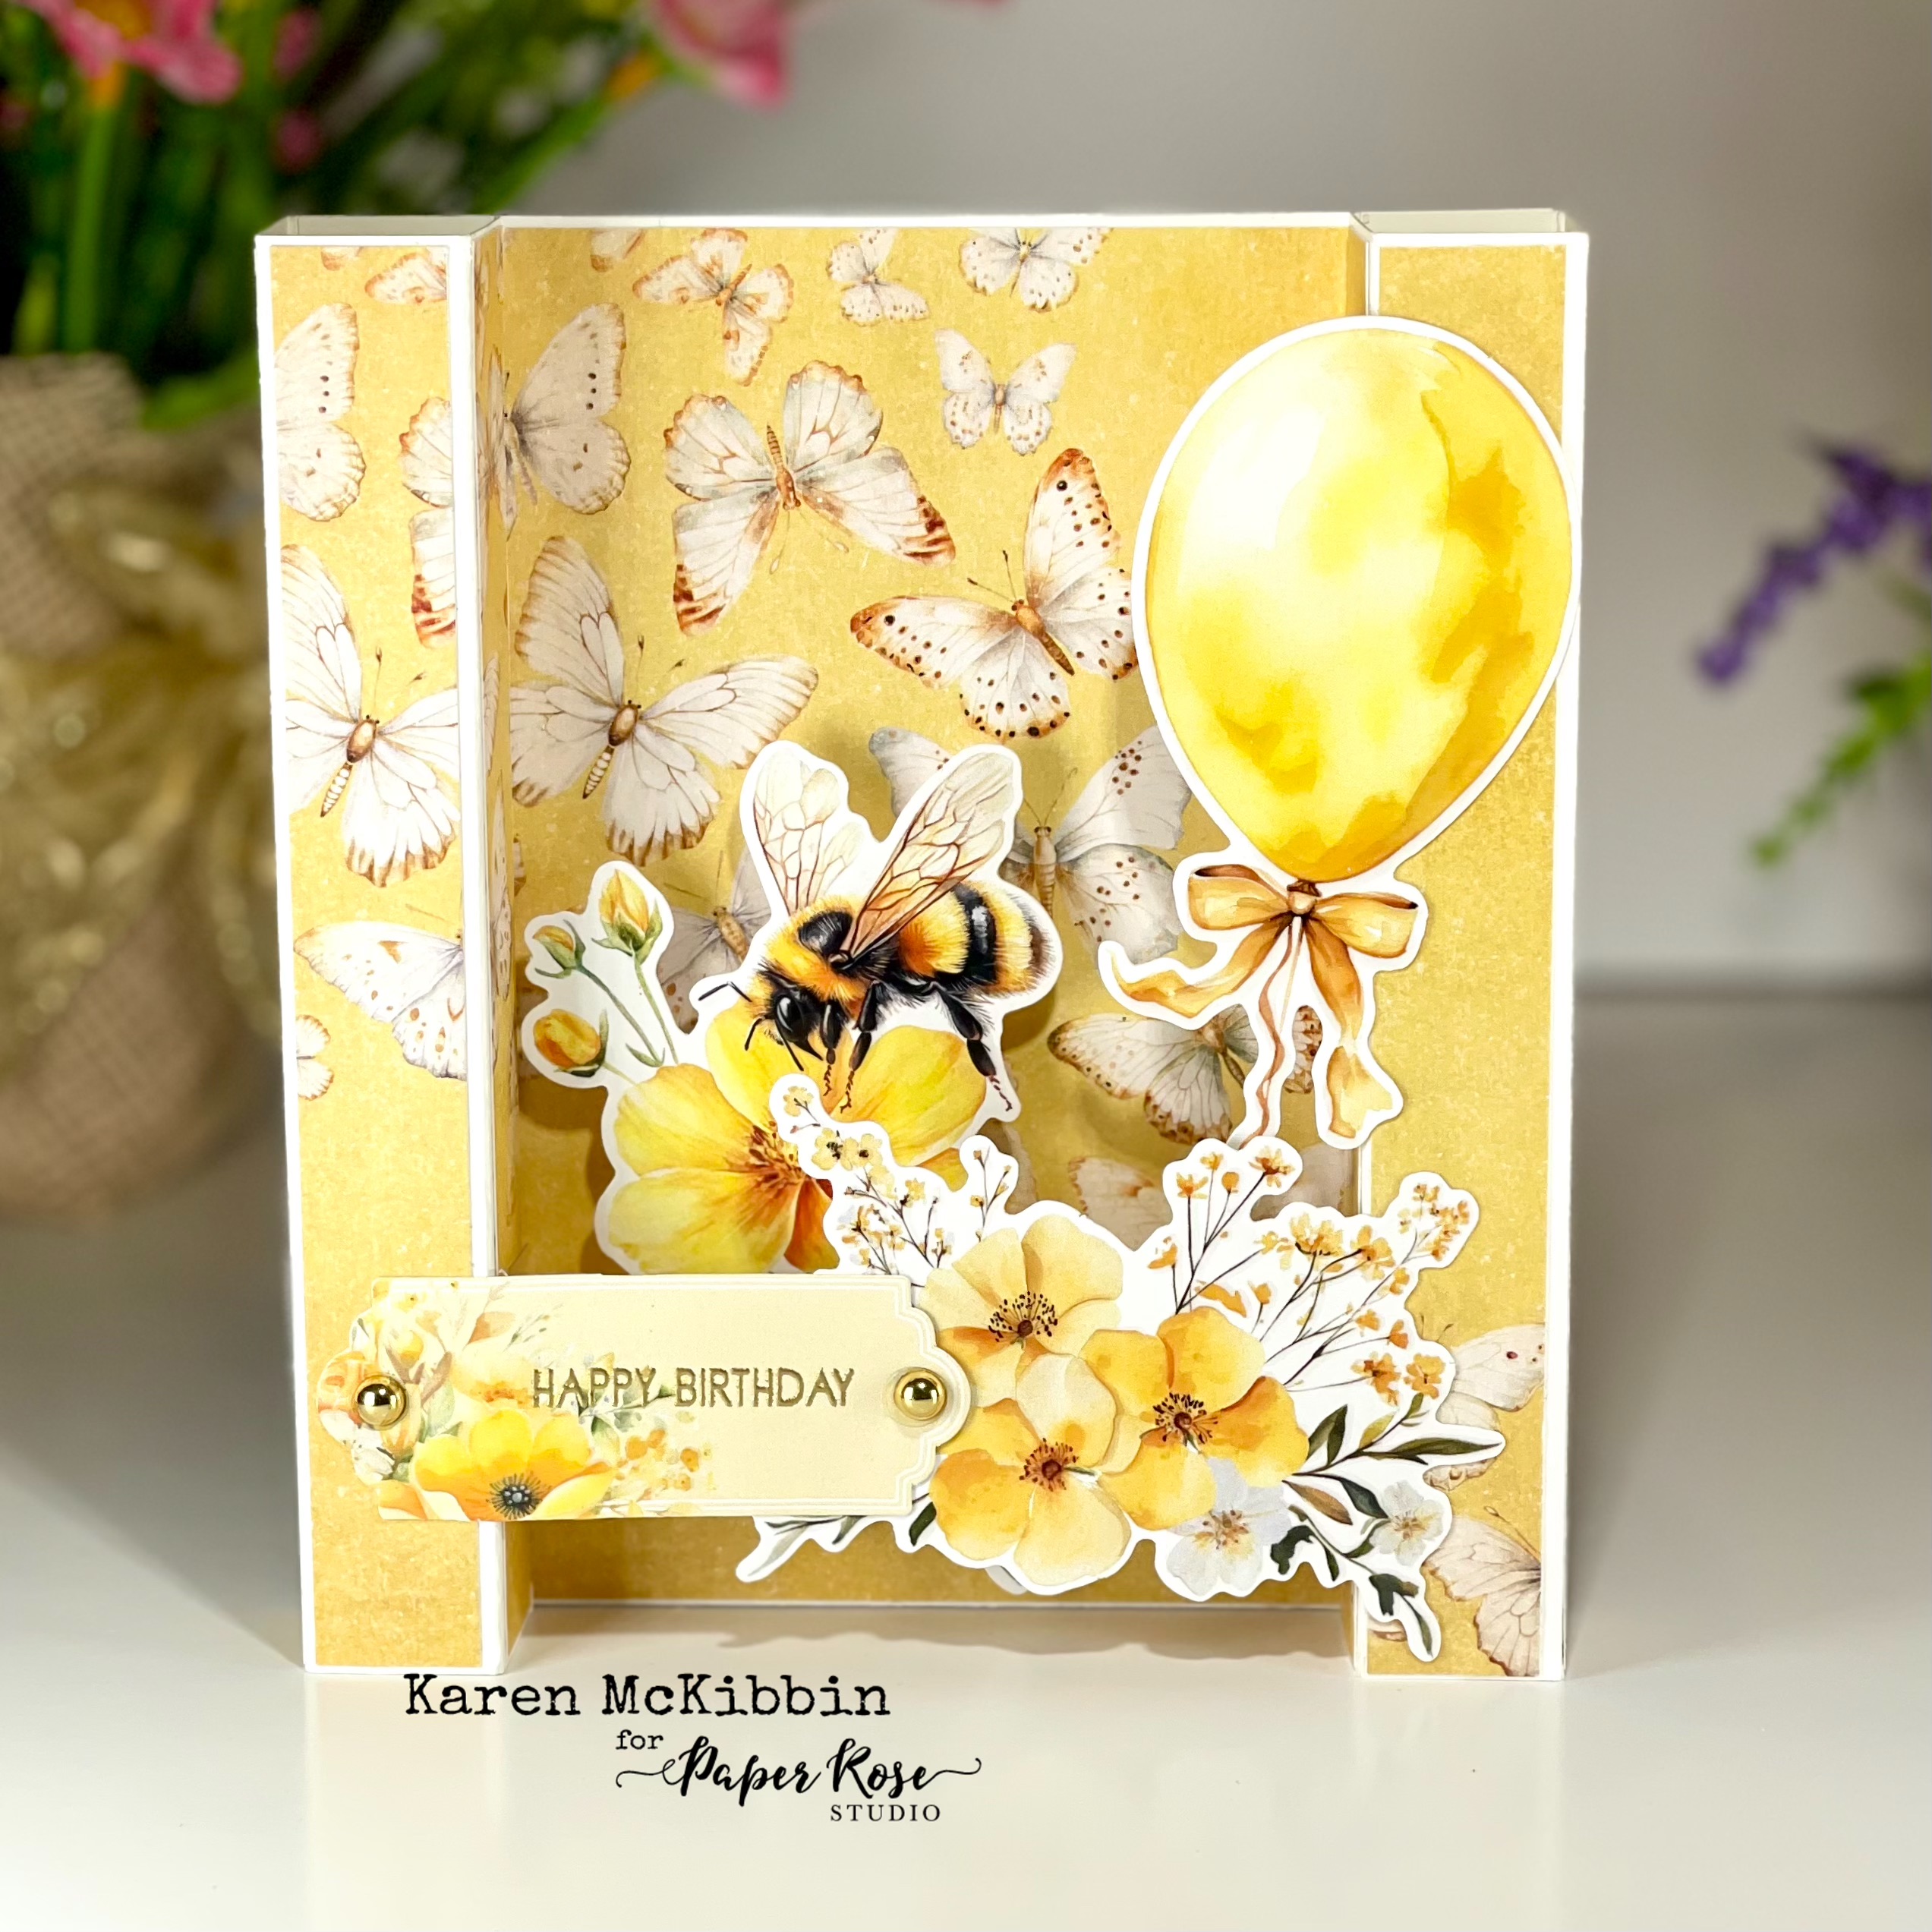
Hello again, I've got 3 cards to share today, but 2 of them are the same style. I was just having fun and created the same card style again.
Paper Rose Studio Supplies:
Bees & Butterflies 6x6 Paper Collection 33558,
Bees & Butterflies Embossed Die Cuts 33585,
Super Day Sentiments Stamp Set 25933,
Fancy Script Layered Hello Metal Cutting Die 32478 Both of these cards are the same style and are easy to make. I started with a 4 3/4" wide by 5 1/2" tall piece of cardstock. I also cut 2 pieces of 3 3/4" wide by 5 1/2" tall pieces of cardstock. I scored these along the 3-3/4" edge at 3/4", 1 1/2", 2 14' and at 3". I folded and scored all of these into mountain folds and then glued the last fold to the first section which created a tall square. I then glued these squares to the left and right sides of the card front, lining up the edges. Then I added panels of cardstock from the Bees & Butterflies paper collection to the front of the cards. I also cut a strip of acetate that was 3 3/4" wide ( the height will depend on the images you want to add - mine was 1" high), and then scored it 1/4" in from both ends. I folded and burnished the folds in mountain folds, added double sided tape to the ends, and then inserted the strips of acetate inside the front of the card between the square ends and about a third of the way up from the bottom.
Finally, I added the images and sentiments to the card front and across the acetate strip. You can add some dimension to the images that go in the center of the card, as I did with the large butterfly and the bee image.
Other Paper Rose Studio supplies:
Beautiful Bouquet 3D Embossing Folder 32949 For this card, I cut down a panel of one of the Bees & Butterflies 6 x6 papers to be a little smaller than my card front. I embossed this in the Beautiful Bouquet embossing folder, and then dragged some yellow Catherine Pooler ink across the raised surfaces to get a bit of shading. I stamped and gold heat embossed the sentiment onto one of the tags that was in the Embossed Die Cuts collection. I punched holes in the sides and threaded some thread through the holes and then wrapped the thread around to the back of the panel. I then mounted the panel onto my card base, and added a few butterflies I had fussy cut out of the 6 x 6 paper. Finally, I added a few gold pearls across the front.
Thank you for stopping by today and I hope I've given you some ideas on how to use this collection.