Saturday, 31 August 2019

Gerda Steiner's Chicken Scratch card with a Singing Puppy!

Hello again everyone!  I'm back with another card using Gerda Steiner's "Chicken Scratch" stamp set and a very happy, singing puppy from her "Howl are You?" stamp set.  I am honoured to say I am also a guest designer again today on the Gerda Steiner blog! You can see her blog HERE.  I absolutely adore this little puppy and have found ways to use him on several cards.

I started by stamping all my images onto 110# cardstock using copic friendly ink (I used Gina K amalgam black ink).  I then used copic markers to colour in all the images and then fussy cut them out.  The markers I used are shown below and also at the end of this post in a list.  I also used a black glaze pen on all the eyes.


For the background, I used the Cloud stencil from My Favorite Things with Distress Oxide Tumbled Glass ink to make the sky.  I then used Lawn Fawn's Little Picket Fence border die to cut a fence from white cardstock.  I also cut the grass from green cardstock that I had in my stash, using Lawn Fawn's Stitched Hillside dies.  I embossed the grass using Lawn Fawn's Stitched Trails die to give the grass area some interest.


I then adhered the grass and fence onto my card front.  I stamped the Happy Birthday sentiment (from MFT's Essential Sentiments stamp set) with Versafine Ink, and then heat embossed it with white embossing powder. I stamped the "To YOUUUUUUUU!!!" sentiment onto white cardstock using VersaFine onyx black ink, and then freestylye drew a speech box around it using a T ruler and rounding the corners.  I fussy cut this out and used a blending foam to ink the outside edges with Tumbled Glass Distress Oxide Ink.


Then I adhered all my images to the card front.  I popped up the puppy and the "To YOUUUUUUUU!!!" sentiment on foam tape while all the other images were glued directly to the card front.  Finally, I adhered my card front to the card base.

Thanks again for joining me, and I hope you have a wonderful day!

Supplies used:

Gerda Steiner - Chicken Scratch, Howl are You? stamp sets
MFT's cloud stencil
Lawn Fawn dies - Little Picket Fence, Stitched Hillside, and Stitched Trails
Distress Oxide Tumbled Glass ink, Versamarkink, Versafine onyx black ink, Gina K amalgam black ink
Copic Markers:
Chickens - R24, Y17, E23, E35, E13, E11, C2, E40
Rooster - BG78, BG18, BG49, BG32, R24, Y17, E35, E13, E11
Pig - R22, R20, R43, N4
Dog - E79, E59, E51, E53, E34, E23, R39, R29, R35

Monday, 26 August 2019

Gerda Steiner's Chicken Scratch and Howl are You?

Hello Everyone!  I know I've been MIA from my blog but its been summer and there has been a fair bit going on here as well as a short holiday.  I’m super excited to tell you that I have also posted this card as a guest designer on the Gerda Steiner blog today!! You can check out her blog HERE. I’m just so grateful to Gerda for this opportunity. I've got a card today made with the adorable "Chicken Scratch" stamp set from Gerda Steiner and I had this idea to pair it up with some of the puppies from her "Howl are You?" stamp set.  I absolutely love the expressions on the faces of her animals - they tell a story without needing any words!


I stamped out all the chicken images with copic friendly ink ( I used Gina K black amalgam ink).  The pictures below show which copic markers I used, and I have them listed below also.


I had previously stamped and coloured in this dog from the "Howl are You" set several months ago.  I frequently do stamp more images and colour them all at the same time as it saves time trying to decide which markers to use and then getting them out.  Then I store them either with the stamps or in a plastic folder so I can quickly make a card as needed or when inspiration strikes!  So I'm not entirely sure which markers I used, but my best guess is N4, N6 for his paws, E79, E59, E57 for the darker brown areas, and YR23, E35 for his snout, and R20 for inside his ears.  I also used a black glaze pen for the eyes on both the chickens and the dog as well as the dog's nose.  I used glossy accents to fill in his teeth and give them a little shine.


After colouring in all my images, I fussy cut them out.

I die cut the frame from black cardstock using a Double Stitch Rectangle Frame die from Poppy Stamps.   I adhered black foam squares from Scrapbook Adhesives to the back of the frame to give it  some dimesion.
I also cut one of the frames from white cardstock and kept the middle inside piece for my card.  I embossed this inside piece with an embossing folder from Taylored Expressions called On the Spot. I liked how the circles give a rather whacky feel to the card which I thought was in keeping with the stacked chickens and long suffering dog.

Once everything was cut and embossed, I positioned my elements on my card and decided where I wanted my sentiment to go. I then positioned my card front in my stamp positioner, removed my elements leaving the stamp in place, and embossed the sentiment with Versafine black ink.


Then I adhered my frame above the sentiment, added in the inside embossed piece and then finally adhered my dog and chickens.  The final step was to adhere my card front to my card base.

Thank you so much for joining me for this fun little card.  Have a great day and happy crafting!

Supplies used:
Gerda Steiner stamps - Chicken Scratch, Howl are You?
Poppy Stamps - Double Stitch Rectangle Frames, model 1996
Taylored Expressions - On the Spot embossing folder
Copic markers - R24, R20, Y17, E23, E35, E13, E11, E40, C2, N4, N6, E79, E59, E57, YR23, E35.
Ink - Gina K black amalgam ink, Versafine Onyx black ink
110# cardstock

Friday, 12 July 2019

Little Panda Agenda Pop Up Card

Little Panda Agenda Pop Up Box Card


Hello again and welcome! I want to share this pop up box card with you. It’s made with Mama Elephant’s “Little Panda Agenda” stamps. These little guys are adorable and really, they’re already halfway coloured! If you’re unsure about your colouring, these are great stamps for you. 

If you would like to see a video of how I made this card in HD,  Click HERE. 


I started with the front of my card by creating a frame from the Wonky Rectangles dies from MFT out of green cardstock  I also cut the clouds from Hello Bluebirds Sunshine Scene die from white cardstock.  I ink blended these with Altenew Bamboo and Olive inks to make my "hills".  Finally, I die cut bamboo canes from white cardstock with a die from Memory Box called Bamboo Poles.  I coloured in the canes with Copic markers in YG03, YG17, and E53.  


Next, I used Mermaid Lagoon Distress Oxide ink and MFT's cloud stencil to make my background for the front of the card.  I used the largest wonky rectangle die to cut this out so it was the same size as my green frame.


I stamped my sentiment onto white cardstock using the Altenew Bamboo ink.  I added foam tape to the first row of hills and along the sides and top of my green frame.  Then I positioned all my elements where I wanted them to go on the front and adhered them with glue. I couldn't find a good spot for my sentiment as the front was quite busy, so I fussy cut it out and glued it to the bottom centre of the frame.


On the inside of my card, I die cut a pop up box from Lawn Fawn's Mini Pop Up Box die set out of green cardstock.  Lawn Fawn has a great video on how to assemble this box if you wish to see it HERE .  Instead of colouring on the outside of the box, I chose to emboss it with a bamboo embossing folder from Craft Concepts.  On the back of each of the pandas I had chosen to go on the inside of the box, I placed double sided tape.  Then I adhered scrap strips of acetate (saved from packaging) to the backs of all the pandas.   Next, I positioned all my pandas in the box, attaching them to either the back of the box or to the cross strips.  You need to be careful that you don't place the double sided tape below the cross strips or your box will stick together when the card is closed.  I like to position my element where I want it to go, and then feel with my left hand from the bottom up to where the cross strip ends.  I hold onto this point on the acetate and then pull the element down out the bottom of the box.  This is where I trim off the acetate and then I just put a little piece of double sided tape here.


I prefer to stamp my sentiment on the inside before I adhere the pop up box.  To do this, I place the pop up box with the long edge of the bottom triangular tabs running along the crease of my card and roughly centered.  Then I can see how far down to place my sentiment. All of my sentiments on this card are from MFT'S Birthday Bears stamp set.  


Once I had the inside of my box filled, I removed the double sided tape that was on the bottom triangular tabs and lined these tabs up along the fold of my card.  You want to be sure that you are also keeping the box along the vertical centre line.  I try to lightly position one tab at a time along the crease, and then bring the other tab up to its position along the fold line.  Then I press down on the tabs to be sure they are well adhered.  After this, I had to open and close the card several times, just coaxing and helping the box to fold along its crease lines.  It never feels like it will go down at first, but after several opening and closing movements, and creasing with a bone folder, it will go on its own. 


Thanks so much for stopping by and I hope this helps you to be creative!


Monday, 8 July 2019

Pink Ink Designs Elephant Card

Hello again, and welcome to my blog!  I’ve got a new theme for this week of the Daily Marker challenge and it’s new and “rarely used” items. Today I’ve made an elephant birthday card from this beautiful stamp from Pink Ink Designs.


I started by applying an anti-static powder to a roughly 4.5” x 5.75” piece of Canson Montval watercolour paper.  Then I stamped my image on with Versafine black ink and heat embossed it with clear embossing powder. I brushed on a layer of clear water over the whole image and sprinkled on Nuvo shimmer powder in the colours Cherry Bomb, Violet Brocade, and Blue Blitz. I only sprinkled a little of each powder as a little goes a long way with this powder! In areas where the powder seemed dry and wasn’t moving well, I either lightly spritzed with water or used a wet paintbrush to apply a little more water to get it moving. I added more powder as needed and then let everything dry.


  Once it was dry, I went back in with a little gold metallic paint to a few areas to give it some highlights. Then I cut a strip of watercolour paper for the sentiment. I didn’t want to use white cardstock and I like the texture the watercolour paper gives. After applying the anti-static powder to this strip, I stamped my sentiment with Versafine black ink and again heat embossed with clear embossing powder. I then adhered this strip to my card front.  Finally, I trimmed down my card front and adhered it to my card base. 

Thank you so much for joining me and I hope you have a great day! 


Friday, 5 July 2019

Christmas Penguins 3D card

Hello everyone! I'm doing Christmas in July for this third week of the Daily Marker Challenge so here is a fun 3D style penguin card.


To see an HD video of how I made this card, click HERE.


I used several sets of stamps for this card.  The front of the card is made with an adorable stamp set from Your Next Stamp called "Santa's Helpers".  The sentiment on the front is from Lawn Fawn's "Here we go a Waddling".  I stamped the extra two penguins next to the chimney and then used a copic multiliner pen to draw an extension of the snow behind them to make it look like they were on the roof.  After colouring the images with copic markers I stamped the sentiment onto the front.  Unfortunately, my card front moved in my stamp positioner, so it stamped a double image and I had to resort to stamping the sentiment on a scrap piece of paper and fussy cutting it out.  I masked off the images and then ink blended on some Distress Oxide in Tumbled Glass and Blueprint Sketch. Then without removing the masks, I placed the Simon Says Stamp "Falling Snow" stencil over my card front and applied Nuvo Moonstone  glimmer paste over it.  I also added some Nuvo Shimmer pen to the snow on the roof to give it a nice shine. Lastly, I adhered my sentiment with foam tape.

The inside of the card uses stamps from Mama Elephant's "Cool Penguins" and "Little Agenda Trains", as well as a few from My Favourite Things "Santa's Elves". All of these were coloured with copic markers and cut out.

I had decided that I wanted the inside of the card to look like the inside of a house or possibly Santa's Workshop. I masked off the bottom third of the two sides and the central portion of my card base.  I ink blended these areas with a combination of Distress Oxide Dried Marigold and Tattered Rose. In the upper areas of the two sides, I stamped Simon Says Stamp's "Quilted Hearts" background stamp with Versafine ink, and then embossed with a pearl snow embossing powder.


I also cut 3 extra panels of cardstock to layer inside the card and give it a 3D effect. The first piece measured 6" x 4.25", the second was 5" x 3/4", and the third was 4" x 1.25".  Each of these pieces were scored at 1/4" from each end, and again in the middle of each piece. I ink blended each of these with the same Dried Marigold and Tattered Rose Distress Oxide inks.  I folded each crease so that the ink blended side faced outward.  On the largest piece (6" x 4.25"), I die cut the center out.  This die cut could be almost any symmetrical shape you like - a rectangle, circle oval etc..  I then adhered 1/8" double sided tape to each of the side tabs on all three pieces of cardstock.


I removed the backing paper from the left hand tab of the 6" x 4.25" piece of cardstock.  After making sure the center creases lined up, I adhered the left hand side down.  I then did the same with the 5" piece of cardstock and made sure that it was far enough down that the bottom edge was below my die cut opening of the larger piece. I also made sure that the centers were lined up.  Finally, I did the same with the 4" piece, again being sure the centers lined up.


Then I positioned my tree where I wanted it, which ended up being in the center of the card.  I had to make a crease along the center of my tree using my score board and bone folder.  I glued my tree in place, again making sure the centers lined up.  Then I removed the backing paper from the right hand side of each of my cardstock tabs and adhered them to the right side of my card base, again making sure the centers lined up.  I find I need to use my bone folder quite a bit to help "flatten" the layers, and that I need to open and close the card several times to get the tabs to move and crease in the correct way.


I then positioned all my images where I wanted them to be on my card and adhered them with glue to my card base.  Just be careful that when you adhere them, they are not too close to the edges of the tabs as sometimes they may catch when the card is closed.  Using temporary glue or tape may help with this.


Finally, I like to have a little more room to write a message, so I added an extra back to my card. I cut a piece of cardstock that measured 5.75" x 4.25" and made a crease at 1/4" from the 5.75" edge using my score board and bone folder.   I then stamped my sentiment (from the same YNS "Santa's Helpers" that I used on the front of my card) using Versafine ink onto this piece of cardstock.  I placed 1/8" double sided tape along the creased edge, removed the backing paper and lined it up with my card base so that the tab lined up with my card and adhered them together.  Then I adhered the front of my card to the card base with my ATG tape runner and my card was done!!


 Thank you so much for stopping by and please let me know if you have any questions, suggestions or comments for me down below. 


Sunday, 23 June 2019

Avery Elle - Hello Chum Underwater Card

Hi there!  I’m sharing my last beach themed card for this first week of the Daily Marker Challenge.


** If you would like to see an HD video on youtube of how I made this card CLICK HERE


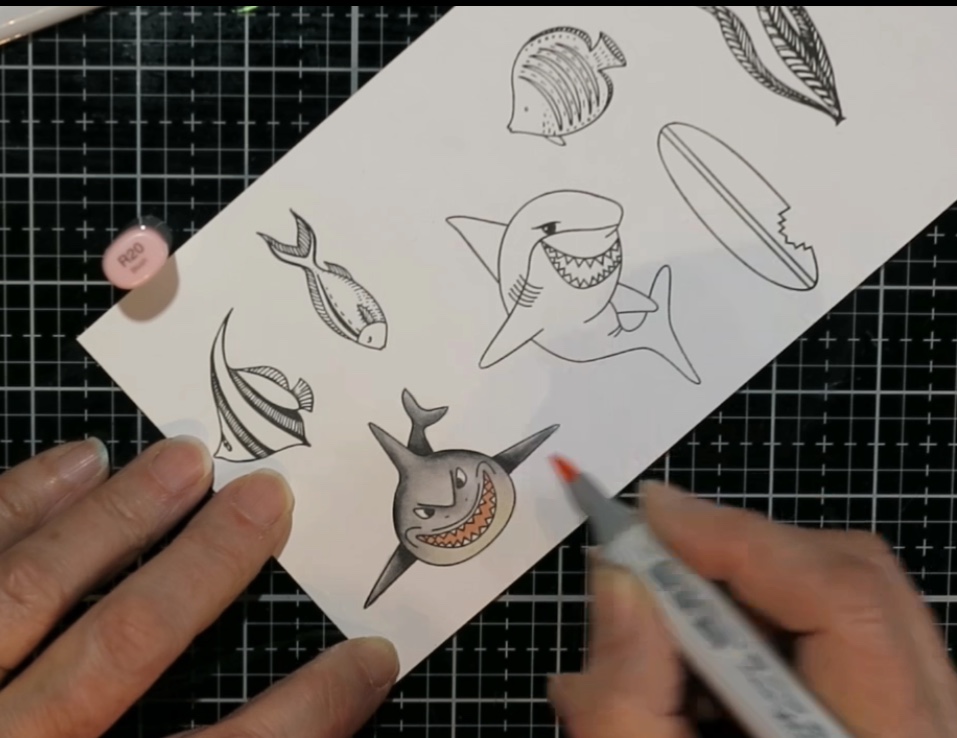
I started by stamping out the sharks and fish onto 110 lb cardstock using copic friendly ink.  I coloured in the images with copic markers and then die cut them out.


To make the background, I started with white 110 lb cardstock.  I used a scrap piece of acetate packaging to first stamp my Distress Oxide inks onto.  Then I sprayed 2-3 spritzes of water onto the ink before applying it to the paper.  I used Cracked Pistachio, Mermaid Lagoon, Shaded Lilac and a little Peacock Feathers. I worked with one colour at a time and just turned my acetate scrap over so I could see where I was applying it on my card base.  I heat set each colour after applying it. 


 When I was satisfied with the background, I stamped on the reef image from Kaisercraft, using Stormy Sky Distress Oxide ink.  I then lightly coloured in the image with copic markers, using muted shades to help give it the look of being underwater.


Then I temporarily positioned my die cuts where I wanted them to go on the front, and  placed my sentiment where it would fit.  I stamped the sentiment with Chipped Sapphire Distress Oxide ink.  I had to stamp it several times to get it dark enough, so I was glad I had used my stamp positioner for this!  I then adhered my card front to my card with a tape runner, and used extra adhesive as the paper had warped slightly from the ink smooshing.

Finally, I arranged the shark and seaweed I had reserved for the inside of my card.  I then stamped the "birthday cake!" sentiment in black Versafine ink on the inside and glued down the diecuts on the inside.

All that was left to do was to glue down the die cuts on the front of my card, add black glaze pen to the fish eyes, and glossy accents for bubbles coming out of the fish mouths.


 Thank you so much for stopping by!