Wednesday, 8 September 2021

Little Reindeer Christmas Card

Hello again and welcome! I have a Christmas card to share today, and I do hope it’s not too early for you. It features the sweet “Little Reindeer” from Gerda Steiner Designs and he seems to have got himself a little tangled up in the Christmas lights. 


I coloured the reindeer image with copic markers and then added glossy accents to all the lights and ornaments before setting it aside to dry.  While it was drying, I created the background by die cutting two borders of snowflakes from a Crafters Companion die set called Joyful Snowflakes. Although you can’t see it in the photo, I spritzed these with some Sheer Shimmer craft spray in Sparkle.  I rotated one panel to go across the top of my card front and placed the other along the bottom edge.  I die cut 5 layers of the circular Paper Rose Geo Mandala from red cardstock and glued these together.  I used the same red cardstock for the sentiment, which is from the “Reindeer and a Tree” stamp set, and white heat embossed the sentiment.  Finally, I glued the mandala circle to the front of the card and popped the reindeer up on foam tape inside the circle. The sentiment is also on foam tape.  So another quick and simple card today!  

Thank you for stopping by and I hope you’re having a great day! 


Wednesday, 25 August 2021

Penguin Thank You Card

Hello again, and welcome. I’ve had a busy few weeks here with visitors and an illness in the family, so I needed a quick and simple card.  And today’s card is exactly that. 


I’ve used the very sweet “Penguin with Heart” stamp set for this one and coloured it in with copic markers.  I then die cut a circle (that was the diameter of the inside of the large Paper Rose Geo Mandala die) from an A2 card front.  I embossed this card front with a 3D embossing folder from Creative Expressions called “Hearts on a String”.  I used some Cosmic Shimmer Opal Polish in Pink Thistle to lightly shade the raised areas of the embossing.  This Opal Polish gives the look of pearlescent paper and changes colour depending on whether you use white or black cardstock - lots of fun!

I also die cut the largest of the Geo Mandala dies from Paper Rose, out of white cardstock, and applied the same Opal Polish to it.  I saved the inner circle from the die cut mandala, and added a very light layer of Distress Oxide ink in Shaded Lilac to it.  

I then glued the embossed card front to the card base, and glued the inked circle inside the opening.  I added a few die cut clouds to the circle.  The penguin was popped up on foam tape and trimmed to fit inside the circle opening.  I used a spray adhesive to adhere the outer mandala ring around the circle opening.  Finally, I already had the Taylored Expressions sentiment (from their Simple Strips Background set) stamped and clear heat embossed so just popped it up on foam tape and adhered it to the bottom of the circle.  

That’s it from me, and I hope you’re having a great day! 


Wednesday, 11 August 2021

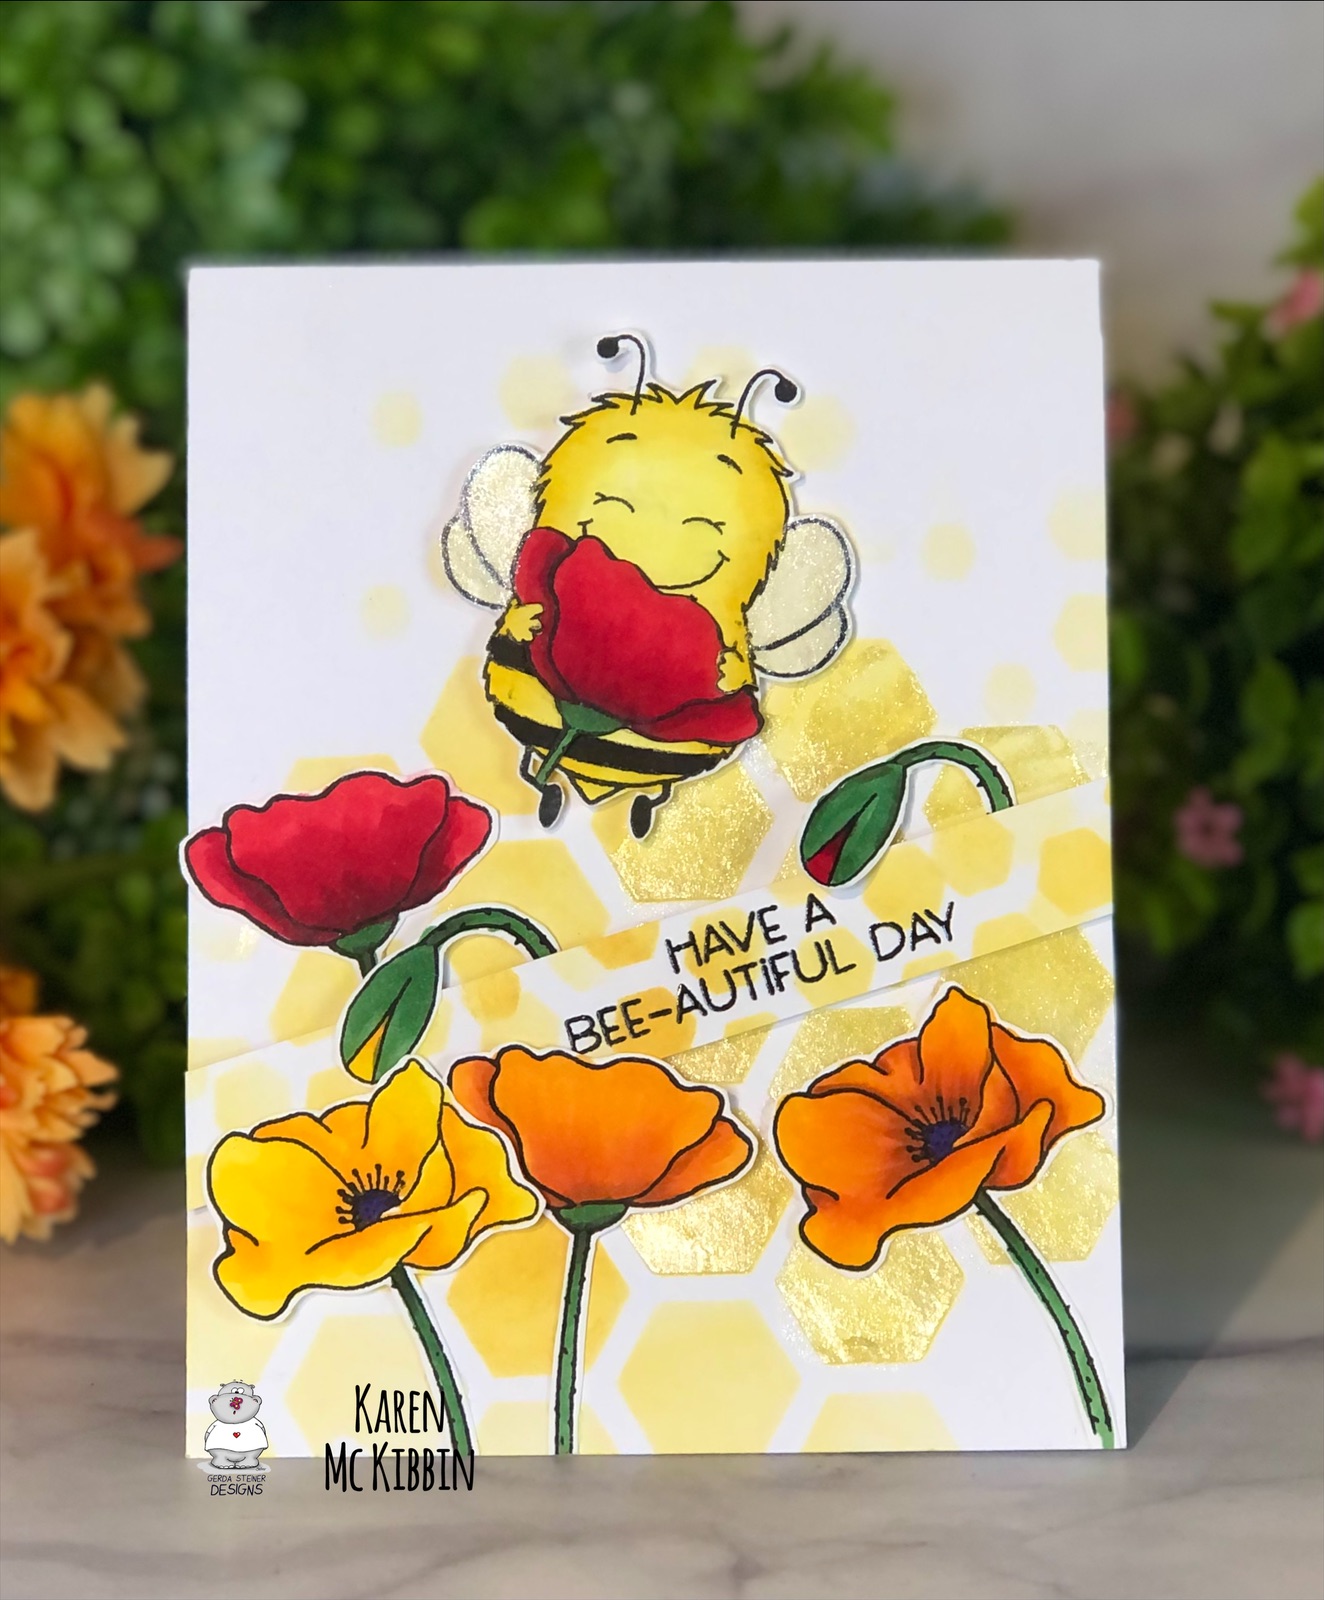
Have a Bee-autiful Day

Hello again, and welcome. I’ve got a card today that’s fun for summer. I’ve used the “Happy Bee-Day” stamp set from Gerda Steiner Designs for this one and kept it quite simple. 


I stamped the images with copic friendly ink onto some Neenah Solar Crest cardstock and then coloured them in with copic markers. I wanted the bee to hold the poppy, so I used a baby wipe to carefully remove the ink from the sign he was holding, before stamping the image. After colouring, I fussy cut the images out and also cut the lower part of the bees’ hand so he could hold the poppy  

Next, I used a honeycomb stencil and some Distress Oxide ink in Wild Honey to create the background as well as the sentiment strip.  My stencil is an older one, I think from Faber Castell, and had two sizes of honeycomb.  I went over some of the stencilling with Moda Scrap gelly paste, as well as over the bees’ wings. This just added some shine to the card, but any clear paste would likely work. The sentiment is from the same stamp set and I just stamped and clear embossed it onto the strip I had created. 

To assemble the card, I mounted the sentiment and bee on foam tape. I also put foam tape behind some of the flowers to add dimension. I glued the poppy onto the bee and then arranged everything onto the card front. So it really was a quick and simple card, but I do love how happy that bee is!  

Thank you for stopping by and I hope you’re having a great day! 
Wednesday, 28 July 2021

Moose Birthday Card

Hello again and thank you for stopping by! I’ve got a simple, one layer, masculine birthday card to share with you today. 


I love this Moose Love stamp set from Gerda Steiner Designs.  The expression on that moose is just priceless! 

I started this card by stamping the moose in a copic friendly ink in roughly the center of my card.  I flicked the grasses on with copic markers (listed below), and just tried to leave a few areas around the moose’s legs to fill in later. I used quite a few shades of yellow-green to add some variation to the grass.  Next, I coloured in the moose and lightly flicked some lighter brown shades down into the grass to help give the image that he was standing in the grass.  I then added some more flicks up around his legs in the grassy colours to finish colouring him in.  I added a few red dots around the grass to look like wildflowers, and used a copic multiliner pen to draw in the fly.  After masking off the moose, I stencilled in the cloudy sky using the Cloud Edger stencil from A Colorful Life Designs. Finally, I stamped and clear heat embossed the sentiment which is in the Moose Love stamp set, before adhering my card front to a card base.  This was a super quick and simple card to make and I think it’s great for a masculine card, so bonus!!

Thank you so much for stopping by and I do hope you’re having a great day! 

Copic markers used:

Moose: E79, E59, E57, E53, E51, E33, R20, R00

Grasses: YG97, YG95, YG63, YG00, R29, R24


Wednesday, 14 July 2021

Thanks a Melon Slimline Card

Hello again!  I’ve got a watermelon filled card today which just felt right on this hot summer day.  I’ve used the Melon Friends stamp set from Gerda Steiner Designs which has to be one of the cutest sets out there.


I stamped the images onto some Neenah Solar White cardstock and then used copic markers to colour them in.   I’ve listed the markers I used down below.  I ended up stamping about three of the dinosaurs and two of the bears.  I used circle dies in different sizes to cut areas out of the images, and just tried to offset where the images were in the circles.  To create the white frames, I used low tack tape to tape together the same circle die used to cut out the image, and a die that was a size smaller.  I cut two of each of these frames, and glued them together before gluing them to the circle image.  I saved the centers of the frames to colour in with copic markers and then added some of these between the circle images.  I diecut the frame from red cardstock using the Trinity Stamps Wonky Stitched Wilderness die set and made it three layers thick.  To assemble the card, I attached the red frame first, then spaced out the images and finally added in the coloured circles and the sentiment.  I popped up the two larger circles on foam tape to allow everything to fit on my card.  Finally, I glued the remaining images to the inside of the card along with the inside sentiment.  

Thank you so much for joining me and I hope you are having a great day!

Copic markers used:

Dinosaur - YG17, YG03, YG01, YG21, YG0000

Bear - R20, E34, E53, E51

Watermelon - R29, R35, YG67, YG01, YG0000


Wednesday, 7 July 2021

Front Pop Up Box Card *VIDEO*

Hello everyone, I’m back with a fun floral card and video. I recently saw a florists’ stand outside the shop that was covered with little pots of flowers and I wanted to recreate it into a card. So although my card isn’t covered with pots of flowers, there is one big box of flowers that folds down to allow the card to be put into an envelope. And the best thing is that you don’t need any special interactive dies for this one! I have used the Creative Expressions Beautiful Blossoms die set for the flowers, but you could also stamp flowers and cut them out using any set in your stash.


I’ve made a quick video for you showing how I made this card.  If you would like to see the video, PLEASE CLICK HERE.

Thanks for stopping by and I hope you’re having a great day!